I never owned an open top tool bag so when I was given one I figured it would end up in the junk pile rather quickly. Especially since this one was rather dingy, covered in rust stains and had someone else’s name written on the side. But I was curious to see how it worked and see if I would like it. It turns out there is a reason tool bags (and tool boxes) have had this design for a hundred years. It’s convenient! Everything in eyes sight and accessible.
Size wise the bag was perfect for any around the house jobs and long enough for a framing hammer, tall enough for my longest pliers or screwdrivers. The only problem is, it’s… well ugly, grungy and has someone else’s name on the side. Also, my experience with cotton tool wraps is they invite rust so I really try and keep cotton that’s not been waxed\oiled away from my tools. So there was only one thing I could do, redesign it and make my own out of modern materials.
The design
I decided to do a prototype first out of 500D Cordura. I could see that the sides and bottom of the bag would be many layers thick, and since I was planning on adding more pockets both to the outside and inside of the bag this would only get worse. 500D is strong, abrasion resistant and would make a good choice.
I wanted something that would hold and organize the kinds of tools someone would be using for handyman type work. I grabbed a couple handfuls of tools and laid out the pockets in a way that everything would fit.
The only compromise I made was skipping the two “spray paint” pockets I had originally planned to add. Sure they would be great when spraypaint was needed, but kind of useless all other times. Besides the inside is a giant pocket that can hold as many cans of spray paint as I’ll ever need.
Assembly
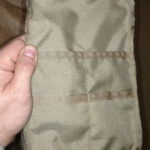
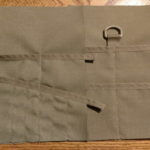
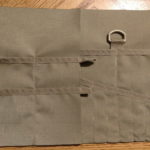
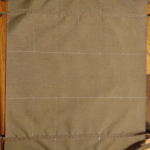
I’ll include some pictures of the assembly below but the design is pretty straightforward. Pockets are stitched down in order. Sides are assembled. The liner is added to the main body. Reinforcements added to the top edges then the sides were stitched in place. I didn’t put enough thought into the top reinforcements and they turned out to be an epic pain in the butt to sew in place.
In the future, I will make sure the 2″ webbing does not need to be folded over right where a narrow band of 1″ webbing is going to be sewn. That seam was 3/8ths of an inch thick and it was no fun trying to keep the stitching straight.
Future improvements
I’m already planning v2 of this bag. I would like the bottom pockets and perhaps the inside to be made with 1000D Cordura. This will provide even more wear resistance from sharp tools but it will also stiffen the sides. When you have 20 pounds of tools in the pockets the bag wants to collapse under the weight. While 1000D is not going to stop that, it’ll make it a little more ridged.
I would also like to make the sides more rounded. The bottom area was 9 layers of fabric thick. When folded in to hide the seam it was 18 layers + 5038 binding tape it’s a little thick for 1″ curves.
The last thing I’m not sure about but I have thought about adding a top strap with a buckle closure. This would serve to keep everything in place on commutes and give a way to attach tools to the bag that are longer than the bag. I’m kind of iffy on if I like this idea or not.
Food for thought
This bag took about 5 hours to make from start to finish. Its well built looks nice and works as designed. When you go to Walmart, or home depot you can find “made in China” tool bags for $12! Is this bag worth the effort? Is it worth the extra price I would have to charge? I think so, but we will see if others agree.
Add-ons
Because everything has got to match, even if its just a prototype…
Check out the add-ons I made to go with this bag:
- Wrench rollup
- Medium & Large pliers roll-up
- Screwdrivers roll-up
(yes, I like roll-ups!)
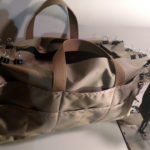
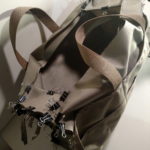
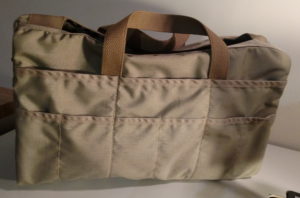
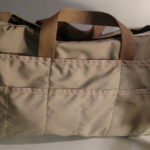
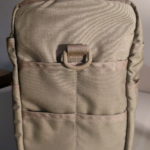
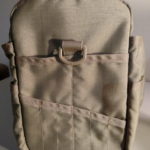
Final Product Pictures
Assembly Pictures