Feb 252023
 

Recycling EPS (Expanded Polystyrene aka Styrofoam) to Make Solids Heavy Varnish for Sealing Wood Exposed to Rain and Standing Water.

Summary: This article describes a simple method for upcycling Styrofoam waste into a useful surface varnish. We will set the goals of durable, waterproof, easily tinted using household materials, and a reasonably good surface finish. I will discuss some of my reasons for the formulation given and also provide some alternatives for the solvent blend. We will also document some tests performed in case I return to this project later to reformulate as a glue which was one of the original paths planned for in this experiment.

Background – Why bother?

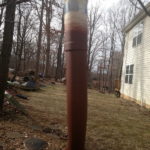
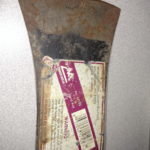
About a month ago we received a large package that used EPS as dunnage to protect the item being shipped. These massive chunks of Styrofoam seemed a shame to just throw away, so I slept on what to do with them.

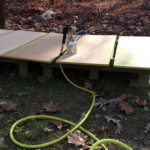
The following morning I performed some experiments making a self-leveling “goop” I planned on applying to some 3D prints after a few experiments I found a way to get a consistent surface but the thick coating resulted in bubbles and adjusting the solvent blend to get rid of this issue resulted in slow dry times and frankly, UV resins do an adequate job so I moved on to making varnish as this also solved the base problems of thick coating.

The base blend was too “fast drying” and thick and resulted in a very poor surface texture so re-blending was needed to bring back both some self-leveling and improve the drying characteristics. This was resolved by adding xylene to thin and slow the drying of the final product.

Selecting a Base Formulation

Acetone disassociates polystyrene quite effectively but does not form workable solutions. It mostly creates a sticky goop of long polystyrene chains that sort of stack together at the bottom of the vessel. MEK is also effective, but acetone is cheaper, and evaporates faster, and therefore is ideal in the final product.

While many solvents truly dissolve polystyrene, toluene has a reasonable boiling point, a moderate evaporation rate, and can hold in solution more polystyrene than any other “common” hardware store solvent. It is however, getting hard to find and if you are unable to locate it, xylene is also effective, though it can not hold quite a concentrated solution, in our case we are using almost a 2x surplus of solvent so this is not an issue.

In the final product. we want a cosolvent containing mostly fast-drying acetone with a 25/30% toluene/xylene blend. The toluene/xylene blend will provide benefits to the surface finish as well as make the mixture a smooth consistent product. Again you can use straight xylene if needed, but dry times will be a little slower, you may experience more bubbles in the finish and the solution will not be clear as it would be with even a small fraction of toluene.

Batching and Improving Feed-Rate of EPS

I could not find a figure for how much EPS could be dissolved per ml of acetone and this is probably because we are not forming a true solution here, instead, we seem to be creating a suspension. Through small-scale experimentation, I found that after 5 grams of EPS was added to 10 grams of acetone (~7.857ml) the mixture would not accept any more EPS at what I would consider an acceptable feed rate. Material added mostly just sat on the surface or formed a clump on the side of the glassware.

I also experimented with pre-blending acetone, toluene, and/or xylene prior to dissolving the EPS and found the feed rate was always decreased when the blend was used. And again this makes sense as the acetone is disassociating the polystyrene leaving a concentrated acetone layer “floating” on top allowing for more and more disassociating. When we form a solution we dilute the solvent in contact with the base stock slowing the process. Secondarily when the solution becomes thickened air trapped in the EPS has a harder time moving to the surface raising the levels in the vessel and slowing the feed rate. EPS is mostly trapped air by volume therefore this must be taken into account. For these reasons we “dissolve” in straight acetone.

Once the acetone tank has processed as much polystyrene as it can, toluene and/or xylene can be added with agitation to form a solution that can be poured or drained from the vessel and the process can be restarted. Straight toluene seems to function best at this step, but the differences are marginal until scaled up to gallon batches.

The Final Formula – Brush-able Varnish with Acceptable Dry Time

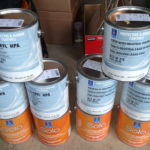
The formula will be given in parts by weight and percent by weight. I will also give an example ~1.5-gallon (5.84 qt.) batch using ml/qt measurements. Depending on the outside temp at application time some thinning or dry time adjustment can be handy so I’m leaving ~1 qt. of free headspace in the F-Type gallon solvent can(s) I’ll be using.

Base Formula:

% Parts
EPS (Styrofoam) 26% 15
Acetone 52% 30
Toluene [1] 9% 5
Xylene [1] 13% 7.5

[1]The ratio of Toluene to Xylene can be adjusted to taste. Performance seems to be best at best at 50/50 (11% each). Due to cost and availability of Toluene the above formulation is a good compromise.


1.5-Gallon (volume) Batch:

Grams mL US Quart
EPS (Styrofoam) 1428
Acetone 2856 2244 2.37
Toluene 476 412 0.44
Xylene 714 621 0.66


Note 1: Remember to leave enough headspace in your storage container. I did not properly take into account the abnormal volume increase from the polystyrene in solution. It’s still not clear why the displacement was more than calculated. But my original large-scale batch overflowed the storage container resulting in losses.

Note 2: Properties are improved with a higher percent of toluene vs xylene and the ratio of the two can be adjusted as needed. The final formula strikes a reasonable balance between the added cost of toluene.

Processing – Lessons Learned

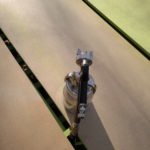
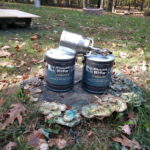
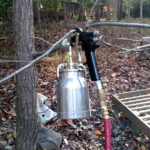
Weigh the acetone and feed it into a suitable vessel (I prefer a wide-mouthed glass jar with a lid). Ensure you have at least 25% headspace to allow for bubbles. More than 25% does not improve the feed-rate, but can make handling easier. EPS should be pre-ground or [as was in my case] cut into strips and feed into the vessel. The formulation allows for 15% excess acetone before the feed rate slows to unacceptable levels; you may adjust as needed.

Once all EPS base stock is fed into the vessel xylene ONLY is added. This will use just over 50% of the headspace and the vessel should be sealed and agitated until all of the material is fully taken into solution. Higher temperatures speed this process, a water bath would speed this process.] The thick liquid [around the consistency of Maple Syrup] was then transferred to the storage container

Note 1: This example was performed on a cold day with a solvent temp of about 37f/3c and the process took 10-15 min.

Note 2: At this point, I like to use the toluene to clean all glassware, funnels, and tools used. This will pull in any losses which occur using such a thick liquid.

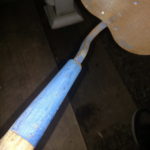
The toluene is now added to the storage container. At this stage, agitation is not critical, after a short while the toluene will dispense throughout the “syrup” and thin the consistency. [At this point our consistency is around that of Elmer’s glue.]

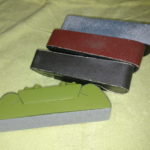
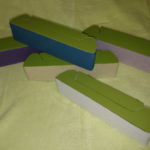
Tinting and Coloring EPS Varnish.

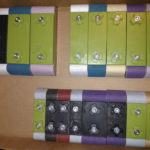
The dissolved polystyrene in the fully blended solvents is now a transparent liquid with a slight white haze. This material is easily tinted with dyes or pigments. Four experiments were performed.

Tint’s all brand universal paint pigment:

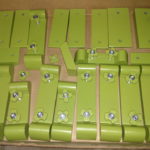
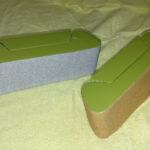
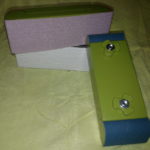
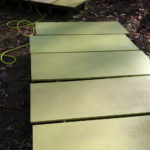
Created a lovely transparent coating that looked wonderful on wood grain. 1 ml. of tint’s all tinted 2-3 fl-oz. of varnish. More could be added to deepen the colors.

Laser printer toner (polyester and pigments):

I have been using “toner” for epoxies for some time and found it dissolved well in this solvent blend. A gram of toner will lightly tint a pint of base material, but it can be added until the material is no longer transparent. Adding additional solvent will be necessary for deep colors using more toner as this will significantly thicken the solution as the polyester dissolves forming a copolymer.

Oil-based paint (Rust-Oleum Professional High Performance Protective Enamel):

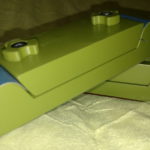
I would call this “semi” compatible as it will change the varnish’s final surface characteristics some. The dried product is hard and durable, but the surface finish is more challenging and bubbles form from the addition of solvents used in the paint. This could be addressed.

Flake Aluminum (Standart Pyro UZ, or similar leafing flake):

Along with Tint’s All, this produced stunning effects, but due to the thick nature of this varnish, brush strokes will always be evident.

Note: Other fillers should be experimented with for adding properties such as wear resistance (Titanium powder, ceramics), UV resistance, and grit to produce added traction.

Other Figures, Tables, and Notes:


Displacement / Polystyrene Volume:

Polystyrene density: 0.96–1.05 g/cm3
Experimentally 600g of PS dissolved displaces 1 qt. of liquid (?)
(This is more than 33% more displacement than the density would indicate. Why?)


Solvent Densities:

Toluene: 0.865 g/mL.
Acetone: 0.7857 g/mL.
Xylene: 0.87596 g/mL.


Useful Conversions:

946.4 mL. in a qt.
4 qts. in a gallon


Mini batch – Thick Semi-transparent solution:

300g of acetone
150g of EPS
60 grams of toluene (this is the minimum to achieve a solution at 18c)

*Adding 3g xylene per 12g of the above mix yields a nice surface finish*


Current costs:
  • Toluene costs $60 per gallon (after shipping)
  • Xylene costs $25 (local pickup)

Other Solvents:

-add from notes-


Straight Xylene:

A test batch using straight xylene was slow to dry and displayed brush strokes after drying. Toluene while not required improves the workability of the final product.


Cleanup:

Cleanup with lacquer thinner causes PS to fill out of solution as a sticky mess. Cleanup with Xylene.


Next Areas to Explore:
  1. Crosslinking agents
  2. Epoxy Hardener
  3. Additives and fillers
  4. Plasticizers (try: diester-phthalate, glycol)
Nov 232019
 

I tend to do a lot of sanding and the sanding blocks I have used are mostly clunky, especially when you what a perfectly flat surface. Most are designed to use 1/3 or 1/4 sheets of paper which are odd shapes to hold in the hand. And the ones for smaller or even different sizes tend to use custom (proprietary) sized sandpaper sheets which limits the grits and usually the quality of the paper you have available.

So Jess and I set off to create a more perfect design.

I needed something thin, comfortable, designed to work flat surfaces, use sheet sandpaper efficiently (no waste), no sharp edges to get caught and ABSOLUTELY must hold the sandpaper under tension (no slack).

We ended up with two profiles: Landscape (Long Version) and Portrait (Short Version).

Due to wanting a perfectly flat bottom and structurally needing bolts held in the body I ended up going with a 3-piece design.

The design uses 2, 1/4-20 bolts to hold the compression plate in place and apply tension on the sandpaper strip. Optionally you can use the Thumbscrew design (also a Jess Orignal) linked below to make disassembly more convenient.

Printing is done in 3 parts:
1) Bottom Plate – for a smooth sanding surface
2) Top “Compression” Plate – to tension the sandpaper and provide a comfortable grip
3) The body – which serves to hold the sandpaper in place under tension.


There are 6 designs in this set available separately.

1) 1-Inch sanding block “portrait” profile
https://www.thingiverse.com/thing:3968065

2, 3) 1.5-Inch sanding blocks “portrait” and “landscape” profiles
https://www.thingiverse.com/thing:3968088
https://www.thingiverse.com/thing:3968111

4, 5) 2-Inch sanding blocks “portrait” and “landscape” profiles
https://www.thingiverse.com/thing:3968118
https://www.thingiverse.com/thing:3968127

6) Thumbscrew “over-mold” for 1/4-20 nut
https://www.thingiverse.com/thing:3968028


Images (Paint and Prime)


Images (Finished Blocks)

Aug 252019
 

Sometimes you come across a tool from the past that just needed to be brought back to life. At least that’s what I told myself when I came across an old rusty egg beater style hand drill at a yard sale last year. I just had to have it, and shelled out the big bucks so I could add it to my collection (if I remember correctly $3, lol).

A few weeks later I came across a few more at a local yardsale, all equally rusted and gummed up. Heck, if I’m going to fix one, I really should just get them all. The fine gent selling them offered $5 for the lot and even threw in a hand plane missing parts and a dry rotting wallpaper paster! How could I say no?

As is usually the case I wish I had taken some pictures of how far gone these tools were.

Fast forward a year and they sat, partly disassembled in a shoebox long since forgotten. Heck, even the wallpaper paster was saved and converted into a filehandle. Yet these poor drills sat in waiting, out of sight, out of mind.

Then about a week ago Jess was moving some dog toys and asked what’s in this box, and can you get it the heck out of here?

Over the next couple of days, I’d put in a few moments in the morning or at night, cleaning, sanding and scrubbing off the rust. Well, after a week of fits and spurts they are finished and ready to go into service. I’m excited to share with you their new look:

This was really a fun little project and I hope to get years of use out of them.

I’ll definitely be keeping my eye out for other similar drills in need of some love.

Jan 272018
 

A while back I picked up some rusty, old garden tools from my friend Harry’s House. If you’re interested you can find more information here.

Paint day

Jess was away for the week and the weather was nice so it seemed like a perfect time to get some painting done. A couple of weeks before I removed the rust using naval jelly and gave them a couple of coats of prime (Rust-oleum Rusty Metal Primer). On painting day they were sanded almost to bare metal and prepared for paint.

The handles on two of the shovels were painted metal flake blue–which I really liked. I had a couple old cans of Dupli-Color MetalCast paint, one was blue so I thought that would be a perfect fit. The MetalCast spray paint requires a base layer (metal flake ground coat), which I had a can on hand. Unfortunately, that was only enough to do some of the tools and one shovel had to be put away for another day.

I hadn’t used this paint for a while and I forgot how frustrating it is. It spatters, clogs and is just generally frustrating, that being said its amazing if you take your time. The spray paint, now 10+ years old was particularly frustrating. The blue can was only about 1/3rd full, and was depleted very quickly, but I had a partial can of purple and green which I finished up the project with.

Before Paint:


After Paint (Day 1):


Update: After Paint (Day 2):

Update: 2/15/18 – More tools completed and ready to use.

After a couple of cold rainy weeks the sun came out for a day and I quickly gathered some more tools that were ready for paint. Most of these got primed over a month ago and got all non-working areas coated with metallic paint a few weeks ago in the paint project above. Today was just finishing the working surfaces with a coat of flat black paint. I really think the floral spade came out especially nice!

Dec 202017
 

Lately, I’ve been working on my spare time refurbishing some old garden tools I got from a friend. The majority of them are nothing special, but they are mostly American steel with years of character and they deserve to be used as intended. It’s always sad to watch old tools rust away.

FREE RUST (MAY CONTAIN SOME OLD TOOLS)

A friend of mine and ex-boss moved out of his old house of 20 years. He decided it was time to downsize and get rid of some of the collections of stuff that not only he no longer uses, but that he was tired of stepping over, moving and trying to find a cubbyhole for. Among the collections–which there where many–was some old gardening tools from when he had a brief interest in gardening 20 years back. He mentioned that many of the tools were from his mothers’ house and were used by his father or mothers father before being gifted to him.

The tools were stored in an open, dirt-floored barn that was filled with leaves, wet soil and in some areas exposed to afternoon sun. The tools were all in poor condition. Handles, resting on the soil, buried in years of decaying leaves left to rot away.

THE FIND OF THE DAY

After digging out some of the many layers of tools in one corner deep below the leaves I strut metal. Under the pile was an axe head (Merit Jersey pattern pre 1927) and an old grub hoe (unknown age or maker). Both of their handles had long since been lost or rotted away. They were the prized finds of this archaeological dig.

PROGRESS SO FAR

It’s been cold lately so working on there has been slow. A little work here and there. I tried removing rust with vinegar but it turns out it doesn’t work well when it freezes solid. Navel jelly also is pretty ineffective at temps below 40f. A good old wire brush and sandpaper seem to work just fine in these conditions so I worked my magic the old way.

I’ve so far removed the rust from most of the items found and have painted all of the rusty metal with a coat of primer. I’m now working on sanding and rejuvenating the handles that are salvageable, replacing the rest. I was not able to find a grub hoe handle locally so I’ll be reshaping a railroad pick handle to fit. If it ever warms up again I’ll be painting the primed surfaces and even though the paint will wear off rather quickly on cutting surfaces it will serve to keep them in fine condition through the winter months.

WHAT WAS IN THE HAUL

I haven’t identified makers for most of the tools. It’s actually unlikely I’ll ever know on most of them. Paint, stickers even makers marks have long since been lost to the elements. Some items have clues I just need to track down.

Among the oddities was a JC Penny spade one that I cannot find any record of ever existing. I’d love to find out who was contracted to make them, but that may not happen for a while.

WHAT WE FOUND:


Notes:

Digging Shovel (long handle)
Markings: USA / Tempered / O

Garden Spade (D-Handle) – Blue Paint
Markings:
On the socket (neck) it is marked: Heat Treated / USA / 2
On the sides of handle it is marked: U-D” / 2075277
Brand: Probably Belknap Bluegrass (based on research)

Utility Shovel & Drain Spade (Plastic D-handles)
Brand: Ames
Markings: Made In China 🙁

Spade (D-Handle)
Markings: 2 / Heat / Treated / Made / In / USA

3-Tine Garden Cultivator – Blue Paint
Markings: USA / A32
Brand: Blue Grass

Pick Mattock – Red Paint
Markings: 5 / Forged / [Japan?]

Cutter Mattock
Markings: EASTCO B-H / Drop Forged / Heat Treated

Pick Axe – Black Paint
Brand: Ludell
Markings: 6

Railroad Pick
Markings: N&W / 7 / [makers mark]
Makers Mark: H in center of route crest
Brand: [[Maybe: Charles E. Hall Company / Probably: Hubbard and Company]]
Notes: Could N&W stand for Norfolk & Western Railroad?

Logo as it appears on the tool.


Reference from: http://alloy-artifacts.org/trademarks-and-logos.html

H-Shield - Charles E. Hall Company - "H" in a shield

Nov 262017
 

The new Muscle Rack Shelves are looking amazing but the color was not what I wanted and the paint used, while about as durable as anything you’re gonna’ find at a big box store, is not up to the task of industrial shelving so its time to paint again.

Originally we decided on a bright, almost fluorescent green called Sherwin Williams Parakeet [SW 6711]. It is a soft tennis ball green color that reflects LED light very well, and somehow is not an eyesore (but be careful looking at it outside in direct sunlight! Total blindness). I got a few cans of Solo made up in this color and proceeded to prime the particle board shelves.

Solo goes on pretty thick and needed to be thinned about 30% before I could get an even light spray. It was applied in 3 thin coats to get good coverage but also because it just did not want to feed in my siphon gun. I love this old siphon gun, but its finicky and will fight you if you don’t get the paint and airflow just right.


Did you ever wonder what $1,120 in industrial enamel coatings looks like?

Well today is your lucky day because here is 3 gallons of Sherman Williams Sher-Cryl HPA, 3 gallons of Water-Based Industrial Enamel and 4 gallons of Solo (their home grade paint-plus-primer in an enamel base). That’s right 10 gallons of paint with the multi-gallon discount it still averages $110 per can.

But you know I’m a cheap bastard, so no way I paid that, not a chance.

Would you believe $11 dollars for all of it after tax? Well that’s what it cost.

This was definitely my lucky day.


Spraying took almost all day but I got them all coated and looking pretty good. They could actually use a sanding and second coat on the wear side just to make sure they hold up.

I’m really happy about the color, it’s a little bit lighter then the sample chip but it looks good in the LED lighting in the sweat-shop and garage.


If you interested in this project, and want to see the shelves in use, the first post about it can be found here: New “Muscle Rack” Shelving.

Oct 282017
 

My sewing projects require a very diverse assortment of narrow fabrics from Webbing to Velcro to Elastic and Binding tape. Since every pattern and color I add, increases the footprint by a significant margin, it was becoming a huge unwieldy mess.

The shelves already in the basement were mostly a hodgepodge of narrow plastic shelving and book shelves. None of which was cut out for the job. Not only was the narrow width cutting into usable space, but the weight of this fabric was taking a toll on the shelves. An upgrade was long over due. I was able to acquire 13 heavy duty “Muscle Racks” from the warehouse and set out to make them usable for my sewing supplies.


The first and most important thing to do was give everything a thorough cleaning. Then paint and seal the particle board shelf’s so they would hold up better in a slightly damp basement.

Jess and I spent way to much time looking at paint chips and trying to find a color that would be bright enough for the basement but wasn’t an eye sore. The color not only had to be bright, but hide dirt and scuffs, it must also blend in with the fabrics. Kind of a tall order, but we selected a color (Sherwin Williams Parakeet) and settled in their high end enamel paint.

Well long story short, it got cold, painting was delayed. The weather broke one weekend and I grabbed what paint I had on hand (Bahr Premium Plus ULTRA Exterior Enamel) and set off to paint.

The color on hand was a dull olive gray. A paint color that’s intentionally boring. I purchased it for painting structural items in the Hosta Prison and the intent was that would blend in regardless of season. Not exactly the color I wanted. Not exactly the toughest paint either, but it would have to do. All in all the color looks great. Sadly it doesn’t reflect the amount of light I hoped for, but its not bad either. The most important thing is they are sealed and ready for business.


Indian summer struck again and I was able to finally spray Parakeet.
Check out the update here: More “Muscle Rack” Shelves

Jul 042014
 

We’ve worked hard for years to find a comfortable bed that Fe! will not trash in an instant. Unfortunately, it seems that no matter how strong the materials she managed to claw through them if given enough time.

The most recent design features a plywood frame with a 1.5-Inch memory foam covered with 3 (or more) layers of 100D Cordura nylon. This has proved to be a workable solution though it needs to be reupholstered every few weeks/months.

So I think its time for a more long-lasting solution. My best idea, a hardwood floor. Well, actually a Pine floor to start, we will upgrade to Oak if she gets through it.

Because I wanted it to look at least as good as the old bed I opted for painting it and giving it an internet-themed “DOGE” paint job.  The pictures below are after the pain work was completed, but before polyurethane was applied.

What do you think?

Dec 212013
 
My Little Pony Cabinet after Stenciling

My Little Pony Cabinet after Stenciling

At work last summer we decided to toss this old grungy cabinet that was once a table for the fax machine. This thing was nasty, but it was a metal cabinet so I took it home and added it to my “to do” list of projects.

Just before it got cold I gave it a good sanding and a few coats of paint. Berry Pink, or so the can said. It’s a bright bubble-gum pink with a good gloss. I hired an artist to convert some sketches into a cut-able vector graphic.

Unfortunately, it then got cold, very cold. So it’s been sitting, just waiting for me to find time to finish it up.

Perhaps it’s a freaking Christmas miracle but its 65F outside today so we fired up the old vinyl cutter. After an hour of Jess and I trying to pick what and where we carefully applied the paint-mask and taped it up real good. The metal has a nice “rolled” textured surface which made the masking all but impossible and unfortunately a lot of bleed through occurred. When the paint sets I’ll go over all of the lines by hand to clean it up.

Unfortunately, it’s unlikely that I will get another warm weekend for a while and there is a lot of work left to do.

The mane and tail are going to get a coat of sparkly purple paint and then a few coats of clear-coat. Then I have some lights to install inside and we are tossing around the idea of a purple shag “ceiling” just to push it over the top!

What do ya think?

Before anyone asks; I’ve not yet seen the show, but the design here was partly inspired by Eric, Jess’s sister’s son who is a fan and posts a lot of pictures to his facebook.

Nov 022013
 
Freshly painted bucket

Freshly painted bucket

Well, mom was pointing out that I do not update my blog (she calls it the moth site) so I thought I’d post a few pictures.

As of late, I have been getting interested in healing herbs (Catauba, Ashwagandha, Mucuna Pruriens, etc). So I figured it was a good idea to make a storage container for them.

I picked up a few old rusted buckets from work with the plan of refurbishing them a couple of weeks ago and they seemed like a good starting point (though a bit big). After sanding them down and neutralizing the rust I gave them a coat of primer. I decided to go with some bright colors for paint and gave them a few coats.

This weekend I cut some stencils and applied the wording. Next weekend I’ll give them a clear-coat treatment and clean up the stenciling some.

I think they came out pretty good. What do you think?