This weekend I built a spiffy… DIY Garden Tool Rack out of scrap wood.
It was an unexpected project that started because I wanted to make something else altogether but couldn’t get to my drill press due to all of the garden tools being stacked in front of it.
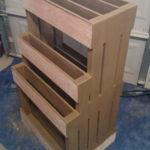
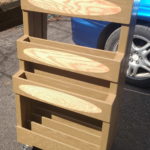
It’s pretty simple. Designed to be columns of tools. The columns are spaced to allow for large items such as pickaxes and tall items such as hoes. The design is not optimal for rakes and shovels…but that’s another project. It needed to be on wheels (casters) and be able to easily hold 500lbs AND needed to be small enough to not increase the footprint the tools are already taking up.
Here’s what I came up with:

— Click to see full-size pic —
I really rushed this project trying to get it done in a weekend and honestly, it suffered because of my lack of time. I was painting in 40-degree weather, and applying topcoats over paint that wasn’t completely dry. Even stenciled over wood that was not yet clear coated.
While it came out OK, it could have been better if I was able to take my time. I was hell-bent on getting it complete in the single weekend so I could move on to projects I actually wanted to work on. I definitely have ideas of how I can do it better next time and there will be a version two eventually. this one is good enough for what I need right now.
Materials: Made completely from 2×4 and 2×3 cut offs and some scraps of 3/4″ oak plywood. 2 of the 2x4s were actually rescued from the outside burn pile, lol.
If anyone wants to copy the design let me know I can provide drawings and stencils. Here are some shots of the assembly. you can probably get everything you need from the pics.
-
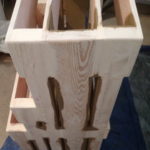
- Assembly n Wood Putty
-
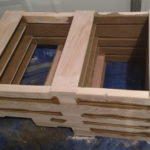
- Inside Painted
-
- Sides Painted
-
- Ovals Stenciled
-

- Second Stencils Applied
-

- Masked and Ready for Paint
-
- Graphics Painted
-

- Stencils Removed
-

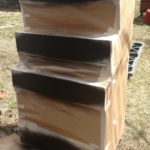
- After Clear Coat
-

- Staged With Random Tools


