Feb 252023
 

Recycling EPS (Expanded Polystyrene aka Styrofoam) to Make Solids Heavy Varnish for Sealing Wood Exposed to Rain and Standing Water.

Summary: This article describes a simple method for upcycling Styrofoam waste into a useful surface varnish. We will set the goals of durable, waterproof, easily tinted using household materials, and a reasonably good surface finish. I will discuss some of my reasons for the formulation given and also provide some alternatives for the solvent blend. We will also document some tests performed in case I return to this project later to reformulate as a glue which was one of the original paths planned for in this experiment.

Background – Why bother?

About a month ago we received a large package that used EPS as dunnage to protect the item being shipped. These massive chunks of Styrofoam seemed a shame to just throw away, so I slept on what to do with them.

The following morning I performed some experiments making a self-leveling “goop” I planned on applying to some 3D prints after a few experiments I found a way to get a consistent surface but the thick coating resulted in bubbles and adjusting the solvent blend to get rid of this issue resulted in slow dry times and frankly, UV resins do an adequate job so I moved on to making varnish as this also solved the base problems of thick coating.

The base blend was too “fast drying” and thick and resulted in a very poor surface texture so re-blending was needed to bring back both some self-leveling and improve the drying characteristics. This was resolved by adding xylene to thin and slow the drying of the final product.

Selecting a Base Formulation

Acetone disassociates polystyrene quite effectively but does not form workable solutions. It mostly creates a sticky goop of long polystyrene chains that sort of stack together at the bottom of the vessel. MEK is also effective, but acetone is cheaper, and evaporates faster, and therefore is ideal in the final product.

While many solvents truly dissolve polystyrene, toluene has a reasonable boiling point, a moderate evaporation rate, and can hold in solution more polystyrene than any other “common” hardware store solvent. It is however, getting hard to find and if you are unable to locate it, xylene is also effective, though it can not hold quite a concentrated solution, in our case we are using almost a 2x surplus of solvent so this is not an issue.

In the final product. we want a cosolvent containing mostly fast-drying acetone with a 25/30% toluene/xylene blend. The toluene/xylene blend will provide benefits to the surface finish as well as make the mixture a smooth consistent product. Again you can use straight xylene if needed, but dry times will be a little slower, you may experience more bubbles in the finish and the solution will not be clear as it would be with even a small fraction of toluene.

Batching and Improving Feed-Rate of EPS

I could not find a figure for how much EPS could be dissolved per ml of acetone and this is probably because we are not forming a true solution here, instead, we seem to be creating a suspension. Through small-scale experimentation, I found that after 5 grams of EPS was added to 10 grams of acetone (~7.857ml) the mixture would not accept any more EPS at what I would consider an acceptable feed rate. Material added mostly just sat on the surface or formed a clump on the side of the glassware.

I also experimented with pre-blending acetone, toluene, and/or xylene prior to dissolving the EPS and found the feed rate was always decreased when the blend was used. And again this makes sense as the acetone is disassociating the polystyrene leaving a concentrated acetone layer “floating” on top allowing for more and more disassociating. When we form a solution we dilute the solvent in contact with the base stock slowing the process. Secondarily when the solution becomes thickened air trapped in the EPS has a harder time moving to the surface raising the levels in the vessel and slowing the feed rate. EPS is mostly trapped air by volume therefore this must be taken into account. For these reasons we “dissolve” in straight acetone.

Once the acetone tank has processed as much polystyrene as it can, toluene and/or xylene can be added with agitation to form a solution that can be poured or drained from the vessel and the process can be restarted. Straight toluene seems to function best at this step, but the differences are marginal until scaled up to gallon batches.

The Final Formula – Brush-able Varnish with Acceptable Dry Time

The formula will be given in parts by weight and percent by weight. I will also give an example ~1.5-gallon (5.84 qt.) batch using ml/qt measurements. Depending on the outside temp at application time some thinning or dry time adjustment can be handy so I’m leaving ~1 qt. of free headspace in the F-Type gallon solvent can(s) I’ll be using.

Base Formula:

% Parts
EPS (Styrofoam) 26% 15
Acetone 52% 30
Toluene [1] 9% 5
Xylene [1] 13% 7.5

[1]The ratio of Toluene to Xylene can be adjusted to taste. Performance seems to be best at best at 50/50 (11% each). Due to cost and availability of Toluene the above formulation is a good compromise.


1.5-Gallon (volume) Batch:

Grams mL US Quart
EPS (Styrofoam) 1428
Acetone 2856 2244 2.37
Toluene 476 412 0.44
Xylene 714 621 0.66


Note 1: Remember to leave enough headspace in your storage container. I did not properly take into account the abnormal volume increase from the polystyrene in solution. It’s still not clear why the displacement was more than calculated. But my original large-scale batch overflowed the storage container resulting in losses.

Note 2: Properties are improved with a higher percent of toluene vs xylene and the ratio of the two can be adjusted as needed. The final formula strikes a reasonable balance between the added cost of toluene.

Processing – Lessons Learned

Weigh the acetone and feed it into a suitable vessel (I prefer a wide-mouthed glass jar with a lid). Ensure you have at least 25% headspace to allow for bubbles. More than 25% does not improve the feed-rate, but can make handling easier. EPS should be pre-ground or [as was in my case] cut into strips and feed into the vessel. The formulation allows for 15% excess acetone before the feed rate slows to unacceptable levels; you may adjust as needed.

Once all EPS base stock is fed into the vessel xylene ONLY is added. This will use just over 50% of the headspace and the vessel should be sealed and agitated until all of the material is fully taken into solution. Higher temperatures speed this process, a water bath would speed this process.] The thick liquid [around the consistency of Maple Syrup] was then transferred to the storage container

Note 1: This example was performed on a cold day with a solvent temp of about 37f/3c and the process took 10-15 min.

Note 2: At this point, I like to use the toluene to clean all glassware, funnels, and tools used. This will pull in any losses which occur using such a thick liquid.

The toluene is now added to the storage container. At this stage, agitation is not critical, after a short while the toluene will dispense throughout the “syrup” and thin the consistency. [At this point our consistency is around that of Elmer’s glue.]

Tinting and Coloring EPS Varnish.

The dissolved polystyrene in the fully blended solvents is now a transparent liquid with a slight white haze. This material is easily tinted with dyes or pigments. Four experiments were performed.

Tint’s all brand universal paint pigment:

Created a lovely transparent coating that looked wonderful on wood grain. 1 ml. of tint’s all tinted 2-3 fl-oz. of varnish. More could be added to deepen the colors.

Laser printer toner (polyester and pigments):

I have been using “toner” for epoxies for some time and found it dissolved well in this solvent blend. A gram of toner will lightly tint a pint of base material, but it can be added until the material is no longer transparent. Adding additional solvent will be necessary for deep colors using more toner as this will significantly thicken the solution as the polyester dissolves forming a copolymer.

Oil-based paint (Rust-Oleum Professional High Performance Protective Enamel):

I would call this “semi” compatible as it will change the varnish’s final surface characteristics some. The dried product is hard and durable, but the surface finish is more challenging and bubbles form from the addition of solvents used in the paint. This could be addressed.

Flake Aluminum (Standart Pyro UZ, or similar leafing flake):

Along with Tint’s All, this produced stunning effects, but due to the thick nature of this varnish, brush strokes will always be evident.

Note: Other fillers should be experimented with for adding properties such as wear resistance (Titanium powder, ceramics), UV resistance, and grit to produce added traction.

Other Figures, Tables, and Notes:


Displacement / Polystyrene Volume:

Polystyrene density: 0.96–1.05 g/cm3
Experimentally 600g of PS dissolved displaces 1 qt. of liquid (?)
(This is more than 33% more displacement than the density would indicate. Why?)


Solvent Densities:

Toluene: 0.865 g/mL.
Acetone: 0.7857 g/mL.
Xylene: 0.87596 g/mL.


Useful Conversions:

946.4 mL. in a qt.
4 qts. in a gallon


Mini batch – Thick Semi-transparent solution:

300g of acetone
150g of EPS
60 grams of toluene (this is the minimum to achieve a solution at 18c)

*Adding 3g xylene per 12g of the above mix yields a nice surface finish*


Current costs:
  • Toluene costs $60 per gallon (after shipping)
  • Xylene costs $25 (local pickup)

Other Solvents:

-add from notes-


Straight Xylene:

A test batch using straight xylene was slow to dry and displayed brush strokes after drying. Toluene while not required improves the workability of the final product.


Cleanup:

Cleanup with lacquer thinner causes PS to fill out of solution as a sticky mess. Cleanup with Xylene.


Next Areas to Explore:
  1. Crosslinking agents
  2. Epoxy Hardener
  3. Additives and fillers
  4. Plasticizers (try: diester-phthalate, glycol)
Dec 252020
 

It’s customary every post begins with “it’s been a year since my last post” so with that out of the way…

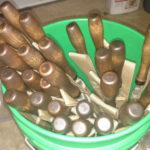
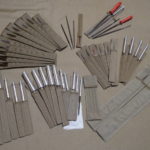
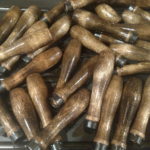
Well, it’s Christmas day and the office is closed so around here that means old tool restoration project. But today’s a little different even though everything is vintage it’s all NOS! So, all I have to do is pretty stuff up to make liking and assemble, what a treat! Today I’m working on some > 1/2-Inch square files, 10 of each cut, 30 to assemble. Rumor has it they were locked up in a maintenance room at a prison, the seller said the boxes were dated 84. Who knows, it’s a good story so let’s go with it…

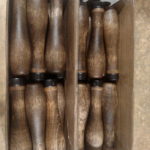
The handles are late 80s\90s vintage from a business that was making a widget, and using the handles on said widget, but since gone under and got dumped back onto the open market. In their many years of sitting, they picked up a rough texture but nothing that can’t be fixed.

After smoothing the handles and removing a bit of rust the handles got a fresh coat of walnut stain, then another sanding and a few coats on linseed oil, then another sanding and a coat of paste wax.

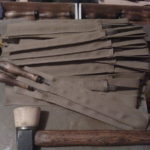
The files had a little rust here and there but for the most part, look quite good, they cleaned up easily and got a paste wax polish on the tangs. They will eventually get a light oil, but I haven’t gotten to that yet.

One thing I can’t stand is the sound of files rubbing on themselves so I stitched up a big pile of file sleeves with some 2″ texcel mil-spec 337 webbing. Assembly is just a couple of taps of a kick-nailer hammer and they seated nicely, well except the two I split…

Nov 232019
 

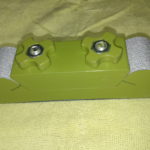
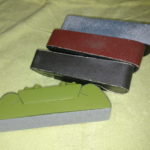
I tend to do a lot of sanding and the sanding blocks I have used are mostly clunky, especially when you what a perfectly flat surface. Most are designed to use 1/3 or 1/4 sheets of paper which are odd shapes to hold in the hand. And the ones for smaller or even different sizes tend to use custom (proprietary) sized sandpaper sheets which limits the grits and usually the quality of the paper you have available.

So Jess and I set off to create a more perfect design.

I needed something thin, comfortable, designed to work flat surfaces, use sheet sandpaper efficiently (no waste), no sharp edges to get caught and ABSOLUTELY must hold the sandpaper under tension (no slack).

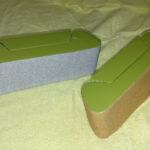
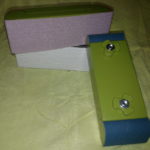
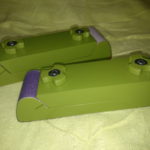
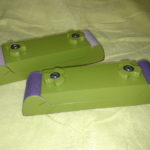
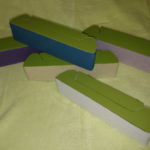
We ended up with two profiles: Landscape (Long Version) and Portrait (Short Version).

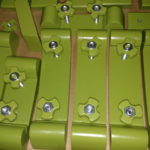
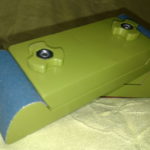
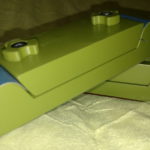
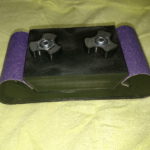
Due to wanting a perfectly flat bottom and structurally needing bolts held in the body I ended up going with a 3-piece design.

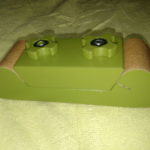
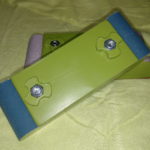
The design uses 2, 1/4-20 bolts to hold the compression plate in place and apply tension on the sandpaper strip. Optionally you can use the Thumbscrew design (also a Jess Orignal) linked below to make disassembly more convenient.

Printing is done in 3 parts:
1) Bottom Plate – for a smooth sanding surface
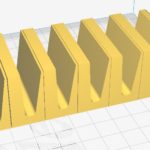
2) Top “Compression” Plate – to tension the sandpaper and provide a comfortable grip
3) The body – which serves to hold the sandpaper in place under tension.


There are 6 designs in this set available separately.

1) 1-Inch sanding block “portrait” profile
https://www.thingiverse.com/thing:3968065

2, 3) 1.5-Inch sanding blocks “portrait” and “landscape” profiles
https://www.thingiverse.com/thing:3968088
https://www.thingiverse.com/thing:3968111

4, 5) 2-Inch sanding blocks “portrait” and “landscape” profiles
https://www.thingiverse.com/thing:3968118
https://www.thingiverse.com/thing:3968127

6) Thumbscrew “over-mold” for 1/4-20 nut
https://www.thingiverse.com/thing:3968028


Images (Paint and Prime)


Images (Finished Blocks)

Aug 252019
 

Sometimes you come across a tool from the past that just needed to be brought back to life. At least that’s what I told myself when I came across an old rusty egg beater style hand drill at a yard sale last year. I just had to have it, and shelled out the big bucks so I could add it to my collection (if I remember correctly $3, lol).

A few weeks later I came across a few more at a local yardsale, all equally rusted and gummed up. Heck, if I’m going to fix one, I really should just get them all. The fine gent selling them offered $5 for the lot and even threw in a hand plane missing parts and a dry rotting wallpaper paster! How could I say no?

As is usually the case I wish I had taken some pictures of how far gone these tools were.

Fast forward a year and they sat, partly disassembled in a shoebox long since forgotten. Heck, even the wallpaper paster was saved and converted into a filehandle. Yet these poor drills sat in waiting, out of sight, out of mind.

Then about a week ago Jess was moving some dog toys and asked what’s in this box, and can you get it the heck out of here?

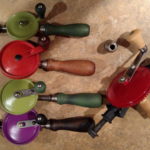
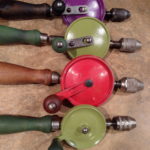
Over the next couple of days, I’d put in a few moments in the morning or at night, cleaning, sanding and scrubbing off the rust. Well, after a week of fits and spurts they are finished and ready to go into service. I’m excited to share with you their new look:

This was really a fun little project and I hope to get years of use out of them.

I’ll definitely be keeping my eye out for other similar drills in need of some love.

Mar 032019
 

Continuing with the shop organization new years resolution today we are looking at a new design:

Modular Magnetic Wrench Organizers.

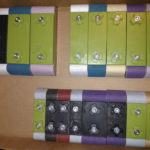
A few weeks ago Jess and embarked on a project that I had been wanting to do for a while ago. Years ago I sketched up an idea for a modular wrench organizer but at the time I did not have a 3D printer and making them out of materials available at the time proved to be troublesome. We started playing around with designs again. Jess having just worked on some bit holders to interface with a Dewalt case copied the double tapered friction connectors to this design and we started printing prototypes.

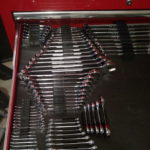
Wrenches come in many sizes and any given set I own has small thin and big and wide handled wrenches. Most of the holders we tracked down are simply one-size-fits-all which really didn’t work for me. From my late 80s craftsman sets to the Husky and Hazard Fraught full polish sets we ended up with a wide assortment of sizes to snuggly fit every wrench.

Lastly to complete the look we designed and printed end plates (front and back) to finish the sets with a clean look. I plan to eventually print these end plates in colors to identify SAE vs Metric, but for now, they are in separate drawers.

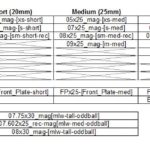
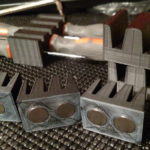
The individual wrench modules snap together with double taper interfaces and are secured in the drawer using two magnets per holder. For this set, we started with 8x8x3 disk magnets for the larger sizes and 10x5x3 for the smaller ones, but once I ran out of 8x8x3’s we made some alternative versions of the bigger sizes using the 10x5x3’s so both versions are included. And because I had a couple of finicky wrenches that didn’t sit quite right in the tapered holders there are a couple of oddball sizes included to make sure everything fit just right.

You can even assemble the “set” then print them all at once 🙂

Lastly to complete the set we also designed and printed 2 sizes of ignition wrench holders.


All files are published on Thingiverse here:


Description for Thingiverse:

This is the most ridiculous modular wrench holders set with 16 sizes to snuggly fit every wrench I have. Unless you also have crazy OCD and need every size to fit perfectly you can probably get away with just printing the medium and large. There is a correct holder for everything from tiny full polish 6mm to 80s craftsman chunky 1-Inch box wrenches and everything in-between.

Most of the wrench holders I’ve seen are either one-size-fits-all or fixed wrench count neither of which worked for me.

The individual wrench modules snap together with double taper interfaces so you can fit a set of two or 32. Get a new wrench just separate the rack, insert a new holder, and snap it back together. The rack is secured in the drawer using two magnets per holder so they do not slide around even if the drawer is slammed shut.

For this set, we started with 8x8x3 disk magnets for the larger sizes and 10x5x3 for the smaller ones, but once I ran out of 8x8x3’s we made some alternative versions of the bigger sizes using the 10x5x3’s so both versions are included.

Lastly to complete the look we designed and printed end plates (front and back) to finish the sets with a clean look.

Mar 032019
 

Back to the toolbox cleanup again.

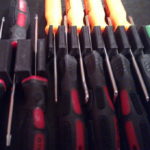
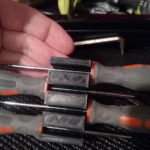
This time Screwdriver holders to keep them pesky rolling all over the place drivers inline.

Originally I thought I would be using the modular wrench racks to hold the screwdrivers but Jess and I worked hard to get all the extra space out of them so the wrenches would fit snuggly and frankly the screwdrivers didn’t fit. We started with the ignition wrench holders and made some modifications for precision screwdrivers and just scaled up to build the standard driver sets.

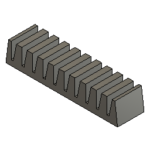
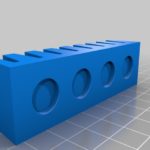
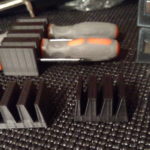
We ended up with a few designs to accommodate all the different sizes of screwdrivers. Since I wanted to keep like drivers together we once again made a modular design using magnets to keep them in place and hold onto the drivers.

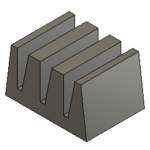
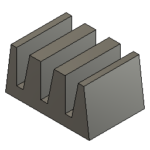
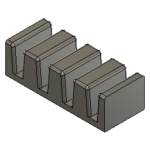
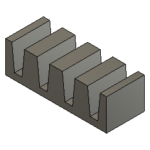
The precision screwdriver files consist of 3, 4-slot files (bottom width of 2mm, 3mm, 4mm) and 1, 6-slot file. All accept 12x12x2 disk magnets press it in place.

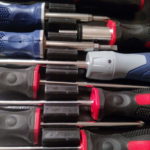
The standard screwdriver sets consist of all 4 driver racks XS, S, M, L, and LX. The XS (extra small) fit a set of husky small drivers and the LX (extra large) is for HFs 6 in 1 screwdriver which I use a lot. 80% of my old USA made craftsman and Husky drivers fit nicely in the Medium and Large size. These accept 20x10x4 bar magnets press fit. These big magnets are overkill, but work well to hold everything firmly in place.

It’s worth noting these are not the high level of finish we usually apply to a project. This was a quick and dirty fix for a problem.


All files are published on Thingiverse here:

Jan 062019
 

For years I would start a project and need to stop and run out for hardware. Worst yet, more times then not I knew I had the bolt or screw, just couldn’t find it. My hardware was in a mix of cardboard boxes and drawers, poorly sorted, all over the place. Something needed to be done.

We’ve all probably drooled over Adam Savage’s Sortimo bin racks and wish we have something similar for hardware… No? Just me? OK well, when I first saw his setup I was sold.

Being a poor mofo, Sortimo was not an option but Harbor Freight has a suitable poor-mans alternative the only problem is they have a total of 3 bin sizes. With the new 3D printer I figure I can resolve the fix this problem once and for all.

To start we downloaded all of the designs others did and tested them out. They either didn’t fit well, or only fits some slots, or better yet were to freaking thin they were destined to fall apart with nuts and bolts in them. Plus it like no one thought though printing…supports under the boxes to support the registration tabs. Eh, I just didn’t like them.

Jess and I worked together and designed bins that worked for all the situations we could think of. It took a bunch of revisions and printing nearly a 1kg of filament to get it right. But I think we got it.

If you’re at all interested in printing some for yourself we have posted the STL files to Thingiverse here: Harbor Freight Storage Boxes (Improved Version):  https://www.thingiverse.com/thing:3338445

Download the Size Chart and Info PDF here:


Inside Adam Savage’s Cave: The Tool Boxes

Aug 122018
 

Blacksmiths Polish is a mixture of Bees Wax and Linseed Oil that is applied to metal and wood surfaces to protect, waterproof and lubricate. It’s touted as a perfect protective coating for hand tools and is used on wood planes, hammers, handles and hard surfaces such as table saw tables.

My search started with a simple question…

What if there was a simple rub on coating that could:

  • Prevent iron from rusting?
  • Lubricate working surfaces?
  • Water-proof leather?
  • Protect wooden handles from drying out?

What if it was a 100+-year-old formula, made with natural, mostly non-toxic household materials… Sounds pretty good, right?

Seems like if all of that was true, someone would’ve slapped a label on that shit and start selling it yesterday.

Well, they did, and they are. There are actually a few dozen products — from boot water-proofing to furniture polish — all share the same heritage. They are each simply twists on the old blacksmith polish of years back.

I started experimenting with this paste a couple of days ago and already I’m wondering why I never heard of it before. Alright, let’s take a step back and start at the beginning…

What is Blacksmith Polish?

The original formula I found was equal parts Bees Wax, Boiled Linseed Oil and Natural Turpentine. But the formula went on to suggest how by adjusting the formula you could make a thicker or thinner “paste” depending on your application. Further research provided lots of simple adjustments that could be made to produce not only altered consistencies but more effective coatings depending on the desired use.

Today I’m going to focus on the original 3-part formula because that’s what I’ve been playing with. The formula is equal parts by volume. I started with a small batch as I was pretty skeptical (I actually sat on the recipe for 5 months before I even bothered to make it).

Here is how it’s supposed to work. The wax dissolves in the turps and is blended with the linseed oil. When the paste is applied to a surface the solvent (turps) evaporates leaving the oil-wax mixture on the surface. The wax fills any crevasses and provides a smooth, waterproof surface. The oil polymerizes holding the wax in place and providing a more durable crosslinked coating.

What you’ll need:

  • 4-ounces of Bees Wax [1-ounce (weight) is 1-ounce (volume) for bees wax]
  • 1/2 cup Boiled Linseed Oil (I used hardware store imitation boiled)
  • 1/2 cup Natural Turpentine (again went with hardware store)

The process is simple: melt wax, remove from burner add solvent and oil, mix until blended.

The instructions said to use a double boiler to melt the wax. It went on to say that it will take several weeks for the wax to completely dissolve and become part of a homogenous mix. There was also a big, bold warning about never heating the mix or instant fire would consume you and everything in a 5-mile radius. Heating solvents is usually a pretty bad idea, so even though I completely ignored this warning I’d suggest you heed it unless you’re prepared to deal with a sudden flash fire.

Here is how I made it.

I placed a shallow pan, filled with an inch of water on an electric hotplate (outside). In the pan–submerged in water–I placed a metal, 1-quart paint can (it was way too big, but whatever it was all I had). In the paint can I added the beeswax and heated until all of the wax was melted. I removed the can from the burner and added the turps, and linseed oil. I then returned the can to the pan of water to speed the dissolving process. Once the wax was re-melted I removed the can from the burner and set it aside to cool.

For me, this mixture was a little too thin. It was similar to applesauce in consistency and color, and I was hoping for something a bit stiffer. I left the top off of the container and allowed more turps to evaporate and within an hour or so it was where I thought I wanted it. A stiff, yet spreadable paste, similar to car polish.

How’s it work?

I’ve been applying this stuff to all manner of tools and surfaces to see how it feels and performs. I’ve been very happy with the results so far…most of the time. Let’s look at a few of the surfaces its been applied to.

First I applied it to an old cast iron table top on my bandsaw. This surface seems to rust no matter what you do to it. Rust makes the surface rough and makes sliding material through more difficult. The paste went on smooth, buffed right off and left a nice smooth, slightly slick coating. It’s only been a few days, I’ll let you know in a month if it remains rust free. (update: it did.)

Next, it was applied to a few large wrenches. These wrenches are rarely used and pick up dust, then moisture, then rust. Used or not I have to oil them bi-yearly and that’s never quite enough. They always have specs of rust. Again the wax went on smooth and they feel great. The wax provided a nice tactile “sticky” feeling. Much better than oil which leaves them well… oily.. go figure.

I also coated a number of wooden handles. Some raw wood, some coated with poly or other coatings.

On the raw wood, it soaked in quickly and filled in the grain leaving a pretty thick coating compared to say linseed oil alone. The material dried to the touch nearly instantly but felt slightly sticky for a couple of days after. Once the linseed oil fully oxidized the handles feel great, smooth, neither slick nor tacky.

Applied over poly the results are a bit different. Right quick the surface felt waxy. After three days no change whatsoever. It’s an acceptable, easy to grip surface but it’s not nearly as pleasant to hold as say a raw linseed oil treatment would have been. Is it better than straight poly, I think, but it’s not as “warm” as I would like. I have a feeling a harder wax would help a lot here, but more on that in a moment

Next up was a large C-clamp which was made from uncoated cast iron and had a lot of texture. It was hard to buff off the excess wax off, and the coating here was much thicker than on any other surface. The threads also held onto quite a bit more than I would like, and required a bit of work to clean up after application. After 3 days the surface still feels tacky, and the threads–though dry and slick–feel sluggish. They don’t have that smooth feeling they would with a straight light oil coating. I think for textured metal surfaces and threads blacksmiths polish is a poor choice.

Lastly, I coated a section of a plywood shelf, again rubbed on thick and then buffed off. The wood soaked up the wax emulsion and was well coated. Boxes and tools slid freely on the coated surface and I’d like to think it’s somewhat better waterproofed after the coating. The best part is no dry time. Rub on, buff off, put tools back.

Side note: The rag I used to apply this stuff took on a nice waxy feel and after it dried was durable yet flexible. With a little tweaking of the formula, it may provide a simple coating for making waxed-canvas fabrics.

Bottom line:

When used on smooth surfaces–that do not need wear-resistant protection–it seems like a winner. 2 thumbs up (as they say).

In my opinion, any protective coating you can simply rub on and are free to use the surface right away is a win in my book. It has not been long enough to say if the coating will be durable (I suspect it will not be) or if it will truly prevent rust (though there are hundreds of results on google saying it will).

I like it better on metal than wood, but it works on both. I think it will be perfect for winterizing my garden tools and frankly any tools that are not regularly used. It feels like it’s a perfect fit for a few applications such as trowels and shovel blades, where a slightly slick coating of the metal would provide not only better usability but also make cleanup a whole lot easier.

What’s next?

First I want to play with some other waxes, particularly harder waxes such as Carnauba and Paraffin. I’m going to try using 50% less solvent next time and may experiment with additives particularly Stearic Acid (durability) and possibly graphite (light lubrication).

Just a quick note before we get into the experiments. It’s now been over a month since the first tests and many surfaces have been coated with both the original formula and subsequent batches and blends. Overall the finish of the paraffin wax has been superior on all surfaces.

The coating of metal and wood and proved to be moderately durable. On cast iron tables that are in regular use, the wax has held strong and has not needed any touchups as of yet.


UPDATE – 8/19/18 (Sunday)

Wanted to try a batch of the Blacksmith polish using Paraffin wax vs Beeswax. From the first batch, I had an idea of the loadings I wanted to aim for; less solvent, similar wax and polymerizing oil content, if anything going 20% heavy on the wax content.

Paraffin is less dense and wanting a slightly higher wax loading I opted for a last-second addition of about 20% to the was content.

1# (453.6g) paraffin = 20 fluid ounces.
1 fluid ounce = 22.68g (181.5g per cup)


Wax type Density (g/cm3)
Paraffin wax 0.88-0.941,2
Beeswax 0.951


Formula:

  • WAX = 222g (about 9.8 fluid ounces)
  • Boiled linseed oil = 1 cup (8 fluid ounces)
  • Turps = 5/8ths cup (about 5 fluid ounces)

Steps:

The process was the same as before, melting the wax, adding the liquid components, returning to the double boiler and heating for an additional 10 min while stirring.


UPDATE – 8/23/18 (Thursday)

The polish as made was difficult to use. It was harder than expected due to the decreased solvent and increased wax loading. Lesson learned.

I decided to re-melt and introduce more solvent and “make up for” the additional wax content by adding more linseed oil. This is just an experiment so the additions were rounded to keep things simple.

Once melted I added 1/4 cup of linseed oil and 1/2 cup of turpentine (solvent). This brings it back to close to the original formula.

New Formula:

  • WAX = 222g (about 9.8 fluid ounces)
  • Boiled linseed oil = 1.25 cups (10 fluid ounces)
  • Turps = 1 and 1/8ths cups (about 9 fluid ounces)

Steps:

The can containing the previous batch was placed directly on the hotplate and melted (this took about 15 min). Once melted the can was removed, additional liquids added then stirred. It stayed liquid so no additional heading was needed. It cooled over the next 5 hours to a thick paste with some free liquid so too much solvent and linseed oil was added.

While cooling I again shook the can to create a froth, this time I was unsuccessful in getting a foamy texture. upon cooling it was a paste similar to the original wax.

Results:

The new formula feels wonderful on wood but takes a while to dry and set. There is again too much liquid loading. Getting the %s right has been difficult.

Note on 8/24/18: I rubbed this in its wet form onto a couple of older dry handles. On the first day, they felt a little wet but still good. They looked amazing though! By day 2 they feel much better, dry, smooth but not sticky. They are easy to grip but not at all tacky. I think paraffin fixes a lot of the problems I had with beeswax on handles.

I also applied a little more to some metal surfaces and it feels good and is a little darker looking than the beeswax. It’s also harder to get an ultrathin buffed coating. If you use a fresh cloth to do the buffing this problem goes away, but I’d rather not have to dirty two rags. Once coated with wax these rags are really only good as firestarters thereafter! haha.

The perfect combo is close, but its almost definitely a blend, which stands to reason since the MSDS for most of the wax polishes contain a blend.

Next Steps:

I still plan on adding different waxes to this mixture for durability. I’m waiting for a pound of Carnauba wax to arrive this will be added to this batch or a new batch. From what I have read 100% Carnauba is hard to work with as it hardens quickly and is not easy to spread or buff if a softer wax is not added. I’m estimating that adding 10% Carnauba wax to this batch should result in a thick paste that is workable, but I do not know (no experience with this new wax).

I may also leave the cover off while stirring occasionally to dry\evaporating some of the solvents and produce a thicker mix. Or I may really get crazy and add more wax…again messing with the formula.

Some of the material has been used, so the exact percentages are no longer 100% known. This limits what can be learned from this experiment.


UPDATE – 8/24/18 (Friday)

Ok, one more try!

I didn’t like the consistency of the last batch and wanted to simply experiment with adding more wax. I’m now in between the original formula which was too stiff and flakey and the last batch which was too thin.

I honestly think I probably went too heavy on the wax content, but it just felt right at the time of the test.

This is getting to be more of a “fun” experiment than a scientific process.

The table below outlines all three batches in percents.

Too Thick Too Thin Try Again
fl oz. % fl oz. % fl oz. %
100% Parafin Wax 9.8 43% 9.8 34% 14 42%
Linseed Oil 8 35% 10 35% 10 30%
Turpentine 5 22% 9 31% 9 27%


New Formula:

  • WAX = 320 grams (~14 fluid ounces)
  • Boiled linseed oil = 1.25 cups (10 fluid ounces)
  • Turps = 1 and 1/8ths cups (about 9 fluid ounces)

Steps:

Same as above.

Results:

Finaly a good ballance between softness and ease of application.

Aug 062018
 

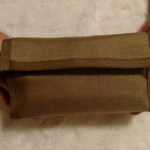
Inspired by the Tool File Condom, Mike and I were talking about storing and transporting tools. We thought it would be nice to create some kind of pouch for the tools he sells. Sounded like a fun project so I told him I’d prototype something.

Last night I went to work and built what I would like if this was something for me. As usual, it came out nice, but overly complex. The time to build it would make it a little pricey to sell.

I like to start right and take away features people don’t want to pay extra for until you end up with something that’s pretty good and still affordable. For instance, the padding is probably excessive, you’d have to be pretty rough to damage this

I took a quickie video for Mike and you can watch it below.

This is just a quick update for you guys since I have not been posting in what seems like forever.

A few pictures from this project:

Aug 052018
 

Over the weekend I went to the steam show to see blacksmithing demonstrations and watch the steam-powered engines do their thing. It’s a great show, but by far my favorite part of the show is the tool vendors who set up on site selling anything from draw-knives to Bridgeport knee mills.

Among the treasures we picked up Jess got a Kelly Wood Slasher she is in love with (quite a score too, original handle, the paper label still on the head and haft). And I picked up some nice used files in some sizes I was lacking mostly first & second cut mill files. So when I got home I realized my tool-roll I use for files is woefully undersized for the new 14-Inch files I brought home.

As you may know, other files are a files worst enemy. As they rub together they file themselves (and each other) down, resulting in a dull, useless tool. These new files that didn’t fit couldn’t be just tossed haphazardly into a drawer, they needed some protection.

While laying out a new design I realized something important about the file storage I have, and all of the storage I have seen sold… they all have the same problem

You only bring 1-2 files to the job site. Most racks, trays and the few roll-ups hold your entire set. Perhaps 30 pounds of files you’re lugging to the work or you have a handful of unprotected files laying about while you work. So what I wanted was some kind of holster for single files. Something like a knife sheath but designed for a file.

This is what I came up with. It’s not perfect and I already have improvement ideas for version 2, but for now, these will do just fine!

I present to you the File Condom: