Dec 252020
 

It’s customary every post begins with “it’s been a year since my last post” so with that out of the way…

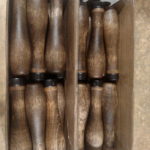
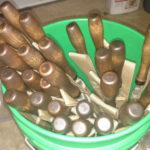
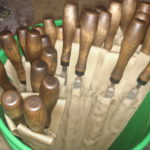
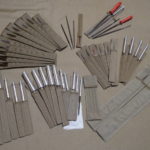
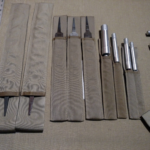
Well, it’s Christmas day and the office is closed so around here that means old tool restoration project. But today’s a little different even though everything is vintage it’s all NOS! So, all I have to do is pretty stuff up to make liking and assemble, what a treat! Today I’m working on some > 1/2-Inch square files, 10 of each cut, 30 to assemble. Rumor has it they were locked up in a maintenance room at a prison, the seller said the boxes were dated 84. Who knows, it’s a good story so let’s go with it…

The handles are late 80s\90s vintage from a business that was making a widget, and using the handles on said widget, but since gone under and got dumped back onto the open market. In their many years of sitting, they picked up a rough texture but nothing that can’t be fixed.

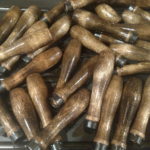
After smoothing the handles and removing a bit of rust the handles got a fresh coat of walnut stain, then another sanding and a few coats on linseed oil, then another sanding and a coat of paste wax.

The files had a little rust here and there but for the most part, look quite good, they cleaned up easily and got a paste wax polish on the tangs. They will eventually get a light oil, but I haven’t gotten to that yet.

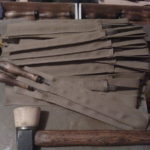
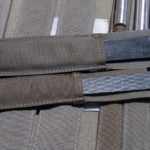
One thing I can’t stand is the sound of files rubbing on themselves so I stitched up a big pile of file sleeves with some 2″ texcel mil-spec 337 webbing. Assembly is just a couple of taps of a kick-nailer hammer and they seated nicely, well except the two I split…

Aug 252019
 

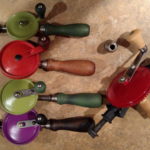
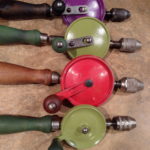
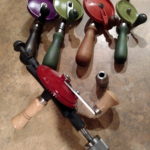
Sometimes you come across a tool from the past that just needed to be brought back to life. At least that’s what I told myself when I came across an old rusty egg beater style hand drill at a yard sale last year. I just had to have it, and shelled out the big bucks so I could add it to my collection (if I remember correctly $3, lol).

A few weeks later I came across a few more at a local yardsale, all equally rusted and gummed up. Heck, if I’m going to fix one, I really should just get them all. The fine gent selling them offered $5 for the lot and even threw in a hand plane missing parts and a dry rotting wallpaper paster! How could I say no?

As is usually the case I wish I had taken some pictures of how far gone these tools were.

Fast forward a year and they sat, partly disassembled in a shoebox long since forgotten. Heck, even the wallpaper paster was saved and converted into a filehandle. Yet these poor drills sat in waiting, out of sight, out of mind.

Then about a week ago Jess was moving some dog toys and asked what’s in this box, and can you get it the heck out of here?

Over the next couple of days, I’d put in a few moments in the morning or at night, cleaning, sanding and scrubbing off the rust. Well, after a week of fits and spurts they are finished and ready to go into service. I’m excited to share with you their new look:

This was really a fun little project and I hope to get years of use out of them.

I’ll definitely be keeping my eye out for other similar drills in need of some love.

Aug 122018
 

Blacksmiths Polish is a mixture of Bees Wax and Linseed Oil that is applied to metal and wood surfaces to protect, waterproof and lubricate. It’s touted as a perfect protective coating for hand tools and is used on wood planes, hammers, handles and hard surfaces such as table saw tables.

My search started with a simple question…

What if there was a simple rub on coating that could:

  • Prevent iron from rusting?
  • Lubricate working surfaces?
  • Water-proof leather?
  • Protect wooden handles from drying out?

What if it was a 100+-year-old formula, made with natural, mostly non-toxic household materials… Sounds pretty good, right?

Seems like if all of that was true, someone would’ve slapped a label on that shit and start selling it yesterday.

Well, they did, and they are. There are actually a few dozen products — from boot water-proofing to furniture polish — all share the same heritage. They are each simply twists on the old blacksmith polish of years back.

I started experimenting with this paste a couple of days ago and already I’m wondering why I never heard of it before. Alright, let’s take a step back and start at the beginning…

What is Blacksmith Polish?

The original formula I found was equal parts Bees Wax, Boiled Linseed Oil and Natural Turpentine. But the formula went on to suggest how by adjusting the formula you could make a thicker or thinner “paste” depending on your application. Further research provided lots of simple adjustments that could be made to produce not only altered consistencies but more effective coatings depending on the desired use.

Today I’m going to focus on the original 3-part formula because that’s what I’ve been playing with. The formula is equal parts by volume. I started with a small batch as I was pretty skeptical (I actually sat on the recipe for 5 months before I even bothered to make it).

Here is how it’s supposed to work. The wax dissolves in the turps and is blended with the linseed oil. When the paste is applied to a surface the solvent (turps) evaporates leaving the oil-wax mixture on the surface. The wax fills any crevasses and provides a smooth, waterproof surface. The oil polymerizes holding the wax in place and providing a more durable crosslinked coating.

What you’ll need:

  • 4-ounces of Bees Wax [1-ounce (weight) is 1-ounce (volume) for bees wax]
  • 1/2 cup Boiled Linseed Oil (I used hardware store imitation boiled)
  • 1/2 cup Natural Turpentine (again went with hardware store)

The process is simple: melt wax, remove from burner add solvent and oil, mix until blended.

The instructions said to use a double boiler to melt the wax. It went on to say that it will take several weeks for the wax to completely dissolve and become part of a homogenous mix. There was also a big, bold warning about never heating the mix or instant fire would consume you and everything in a 5-mile radius. Heating solvents is usually a pretty bad idea, so even though I completely ignored this warning I’d suggest you heed it unless you’re prepared to deal with a sudden flash fire.

Here is how I made it.

I placed a shallow pan, filled with an inch of water on an electric hotplate (outside). In the pan–submerged in water–I placed a metal, 1-quart paint can (it was way too big, but whatever it was all I had). In the paint can I added the beeswax and heated until all of the wax was melted. I removed the can from the burner and added the turps, and linseed oil. I then returned the can to the pan of water to speed the dissolving process. Once the wax was re-melted I removed the can from the burner and set it aside to cool.

For me, this mixture was a little too thin. It was similar to applesauce in consistency and color, and I was hoping for something a bit stiffer. I left the top off of the container and allowed more turps to evaporate and within an hour or so it was where I thought I wanted it. A stiff, yet spreadable paste, similar to car polish.

How’s it work?

I’ve been applying this stuff to all manner of tools and surfaces to see how it feels and performs. I’ve been very happy with the results so far…most of the time. Let’s look at a few of the surfaces its been applied to.

First I applied it to an old cast iron table top on my bandsaw. This surface seems to rust no matter what you do to it. Rust makes the surface rough and makes sliding material through more difficult. The paste went on smooth, buffed right off and left a nice smooth, slightly slick coating. It’s only been a few days, I’ll let you know in a month if it remains rust free. (update: it did.)

Next, it was applied to a few large wrenches. These wrenches are rarely used and pick up dust, then moisture, then rust. Used or not I have to oil them bi-yearly and that’s never quite enough. They always have specs of rust. Again the wax went on smooth and they feel great. The wax provided a nice tactile “sticky” feeling. Much better than oil which leaves them well… oily.. go figure.

I also coated a number of wooden handles. Some raw wood, some coated with poly or other coatings.

On the raw wood, it soaked in quickly and filled in the grain leaving a pretty thick coating compared to say linseed oil alone. The material dried to the touch nearly instantly but felt slightly sticky for a couple of days after. Once the linseed oil fully oxidized the handles feel great, smooth, neither slick nor tacky.

Applied over poly the results are a bit different. Right quick the surface felt waxy. After three days no change whatsoever. It’s an acceptable, easy to grip surface but it’s not nearly as pleasant to hold as say a raw linseed oil treatment would have been. Is it better than straight poly, I think, but it’s not as “warm” as I would like. I have a feeling a harder wax would help a lot here, but more on that in a moment

Next up was a large C-clamp which was made from uncoated cast iron and had a lot of texture. It was hard to buff off the excess wax off, and the coating here was much thicker than on any other surface. The threads also held onto quite a bit more than I would like, and required a bit of work to clean up after application. After 3 days the surface still feels tacky, and the threads–though dry and slick–feel sluggish. They don’t have that smooth feeling they would with a straight light oil coating. I think for textured metal surfaces and threads blacksmiths polish is a poor choice.

Lastly, I coated a section of a plywood shelf, again rubbed on thick and then buffed off. The wood soaked up the wax emulsion and was well coated. Boxes and tools slid freely on the coated surface and I’d like to think it’s somewhat better waterproofed after the coating. The best part is no dry time. Rub on, buff off, put tools back.

Side note: The rag I used to apply this stuff took on a nice waxy feel and after it dried was durable yet flexible. With a little tweaking of the formula, it may provide a simple coating for making waxed-canvas fabrics.

Bottom line:

When used on smooth surfaces–that do not need wear-resistant protection–it seems like a winner. 2 thumbs up (as they say).

In my opinion, any protective coating you can simply rub on and are free to use the surface right away is a win in my book. It has not been long enough to say if the coating will be durable (I suspect it will not be) or if it will truly prevent rust (though there are hundreds of results on google saying it will).

I like it better on metal than wood, but it works on both. I think it will be perfect for winterizing my garden tools and frankly any tools that are not regularly used. It feels like it’s a perfect fit for a few applications such as trowels and shovel blades, where a slightly slick coating of the metal would provide not only better usability but also make cleanup a whole lot easier.

What’s next?

First I want to play with some other waxes, particularly harder waxes such as Carnauba and Paraffin. I’m going to try using 50% less solvent next time and may experiment with additives particularly Stearic Acid (durability) and possibly graphite (light lubrication).

Just a quick note before we get into the experiments. It’s now been over a month since the first tests and many surfaces have been coated with both the original formula and subsequent batches and blends. Overall the finish of the paraffin wax has been superior on all surfaces.

The coating of metal and wood and proved to be moderately durable. On cast iron tables that are in regular use, the wax has held strong and has not needed any touchups as of yet.


UPDATE – 8/19/18 (Sunday)

Wanted to try a batch of the Blacksmith polish using Paraffin wax vs Beeswax. From the first batch, I had an idea of the loadings I wanted to aim for; less solvent, similar wax and polymerizing oil content, if anything going 20% heavy on the wax content.

Paraffin is less dense and wanting a slightly higher wax loading I opted for a last-second addition of about 20% to the was content.

1# (453.6g) paraffin = 20 fluid ounces.
1 fluid ounce = 22.68g (181.5g per cup)


Wax type Density (g/cm3)
Paraffin wax 0.88-0.941,2
Beeswax 0.951


Formula:

  • WAX = 222g (about 9.8 fluid ounces)
  • Boiled linseed oil = 1 cup (8 fluid ounces)
  • Turps = 5/8ths cup (about 5 fluid ounces)

Steps:

The process was the same as before, melting the wax, adding the liquid components, returning to the double boiler and heating for an additional 10 min while stirring.


UPDATE – 8/23/18 (Thursday)

The polish as made was difficult to use. It was harder than expected due to the decreased solvent and increased wax loading. Lesson learned.

I decided to re-melt and introduce more solvent and “make up for” the additional wax content by adding more linseed oil. This is just an experiment so the additions were rounded to keep things simple.

Once melted I added 1/4 cup of linseed oil and 1/2 cup of turpentine (solvent). This brings it back to close to the original formula.

New Formula:

  • WAX = 222g (about 9.8 fluid ounces)
  • Boiled linseed oil = 1.25 cups (10 fluid ounces)
  • Turps = 1 and 1/8ths cups (about 9 fluid ounces)

Steps:

The can containing the previous batch was placed directly on the hotplate and melted (this took about 15 min). Once melted the can was removed, additional liquids added then stirred. It stayed liquid so no additional heading was needed. It cooled over the next 5 hours to a thick paste with some free liquid so too much solvent and linseed oil was added.

While cooling I again shook the can to create a froth, this time I was unsuccessful in getting a foamy texture. upon cooling it was a paste similar to the original wax.

Results:

The new formula feels wonderful on wood but takes a while to dry and set. There is again too much liquid loading. Getting the %s right has been difficult.

Note on 8/24/18: I rubbed this in its wet form onto a couple of older dry handles. On the first day, they felt a little wet but still good. They looked amazing though! By day 2 they feel much better, dry, smooth but not sticky. They are easy to grip but not at all tacky. I think paraffin fixes a lot of the problems I had with beeswax on handles.

I also applied a little more to some metal surfaces and it feels good and is a little darker looking than the beeswax. It’s also harder to get an ultrathin buffed coating. If you use a fresh cloth to do the buffing this problem goes away, but I’d rather not have to dirty two rags. Once coated with wax these rags are really only good as firestarters thereafter! haha.

The perfect combo is close, but its almost definitely a blend, which stands to reason since the MSDS for most of the wax polishes contain a blend.

Next Steps:

I still plan on adding different waxes to this mixture for durability. I’m waiting for a pound of Carnauba wax to arrive this will be added to this batch or a new batch. From what I have read 100% Carnauba is hard to work with as it hardens quickly and is not easy to spread or buff if a softer wax is not added. I’m estimating that adding 10% Carnauba wax to this batch should result in a thick paste that is workable, but I do not know (no experience with this new wax).

I may also leave the cover off while stirring occasionally to dry\evaporating some of the solvents and produce a thicker mix. Or I may really get crazy and add more wax…again messing with the formula.

Some of the material has been used, so the exact percentages are no longer 100% known. This limits what can be learned from this experiment.


UPDATE – 8/24/18 (Friday)

Ok, one more try!

I didn’t like the consistency of the last batch and wanted to simply experiment with adding more wax. I’m now in between the original formula which was too stiff and flakey and the last batch which was too thin.

I honestly think I probably went too heavy on the wax content, but it just felt right at the time of the test.

This is getting to be more of a “fun” experiment than a scientific process.

The table below outlines all three batches in percents.

Too Thick Too Thin Try Again
fl oz. % fl oz. % fl oz. %
100% Parafin Wax 9.8 43% 9.8 34% 14 42%
Linseed Oil 8 35% 10 35% 10 30%
Turpentine 5 22% 9 31% 9 27%


New Formula:

  • WAX = 320 grams (~14 fluid ounces)
  • Boiled linseed oil = 1.25 cups (10 fluid ounces)
  • Turps = 1 and 1/8ths cups (about 9 fluid ounces)

Steps:

Same as above.

Results:

Finaly a good ballance between softness and ease of application.
Aug 052018
 

Over the weekend I went to the steam show to see blacksmithing demonstrations and watch the steam-powered engines do their thing. It’s a great show, but by far my favorite part of the show is the tool vendors who set up on site selling anything from draw-knives to Bridgeport knee mills.

Among the treasures we picked up Jess got a Kelly Wood Slasher she is in love with (quite a score too, original handle, the paper label still on the head and haft). And I picked up some nice used files in some sizes I was lacking mostly first & second cut mill files. So when I got home I realized my tool-roll I use for files is woefully undersized for the new 14-Inch files I brought home.

As you may know, other files are a files worst enemy. As they rub together they file themselves (and each other) down, resulting in a dull, useless tool. These new files that didn’t fit couldn’t be just tossed haphazardly into a drawer, they needed some protection.
While laying out a new design I realized something important about the file storage I have, and all of the storage I have seen sold… they all have the same problem

You only bring 1-2 files to the job site. Most racks, trays and the few roll-ups hold your entire set. Perhaps 30 pounds of files you’re lugging to the work or you have a handful of unprotected files laying about while you work. So what I wanted was some kind of holster for single files. Something like a knife sheath but designed for a file.

This is what I came up with. It’s not perfect and I already have improvement ideas for version 2, but for now, these will do just fine!

I present to you the File Condom:

Mar 202018
 

WOW, got to say thanks to Jess and the Ralphs! You all outdid yourselves!

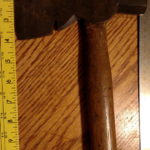
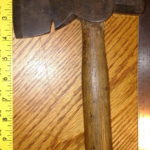
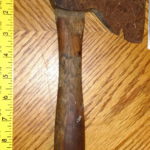
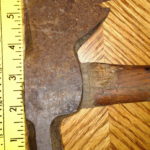
Lately, my obsession has been cleaning up old tools. Particularly old rusty axes, hatchets, and hammers. Jess and I have been keeping our eyes on eBay watching for cheap auctions to snatch up and put back into service. I’m sure I have said it here before, but I’m always excited to daydream about what an old tool may have been through over the years.

An old mushroomed hammer or chips in a bit are all markers of work that was done long in the past. Every few weekends I’ll fix up another and Jess and I will go out and chop up a fallen tree or stump to check them out. It’s been fun and I’m getting a small collection. I now have a few items that are around 100 years old, keeping them in service seems important to me.
Well, my birthday was on the way and Jess and her parents conspired to overload me with fun work. …And they succeeded in spades.

Considering that I’ve had some eBay luck recently too my backlog of projects is impressive.

Below are some pictures of the take to help me track what’s still left to finish. As always I’ll post links to the finished tools as they are completed. With this many, it’s going to be a while!

Hatchets

Style (best guess) Length Width Who Lb./Oz. Grams Notes
Plumb Half Hatchet 5-7/8″ 1-1/4″ Bill 1# 6.1 oz. 630 g. Crack in Poll
Unmarked Shingling w/Nail Pull Hatchet 5-3/4″ 1″ Bill 1# 6 oz. 627 g.
Americanax Half Hatchet 6-1/2″ 1-1/8″ Bill 1# 3.4 oz. 543 g. 1920s, Glassport, PA
C. HAMMOND Half Hatchet

(found a picture of another, stamp matches)

5-7/8″ 1″ ?? 15.9 oz. 454 g. 2
CHAMMOND
PHILA
CAST STEEL
Germantown Lath Hatchet 6″ 1-1/4″ Bill 14 oz. 397 g. Cut and Modified
Kelly Works Half Hatchet 6-3/8″ 1-1/8″ Jess ? oz. ? g. Weldmark
Unmarked Shingling Hatchet 6-5/8″ 1-1/8″ Jess ? oz. ? g.
Unmarked Half Hatchet 6-3/8″ 1-1/8″ Jess ? oz. ? g.
Plumb Riggers/Half Hatchet 6-1/2″ 1-3/8″ Jess ? oz. ? g.  *fav*


Hammers

Style (best guess) Length Width Lb./Oz. Grams Notes
Craftsman 1 lb. Masonary Hammer 7″ 7/8″ 1#  0.6oz. 473 g.
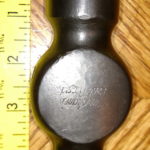
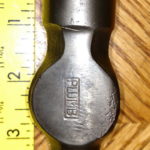
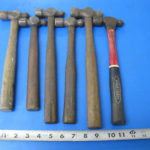
Bimgham’s Best Brand 30 oz. Ball Pein 4-7/8″ 1-1/2″ 1# 13.5 oz. 836 g. Likely 1920s
Craftsman 24 oz. Ball Pein 4-1/2″ 1-1/2″ 1# 8.3 oz. 691 g. Early 1930s
Plumb 24 oz. Ball Pein – Finished 4-5/8″ 1-1/2″ 1# 7.6 oz. 670 g.
Plumb 15 oz. Ball Pein 4″ 1-1/4″ 15.4 oz. 438 g.
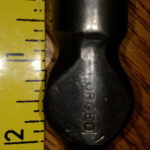
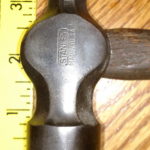
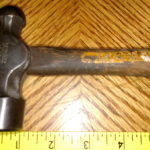
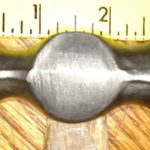
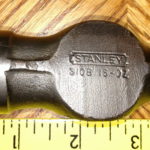
Stanley 16 oz. (310B) Ball Pein 4-1/8″ 1-1/4″ 15.8 oz. 448 g. JobMaster
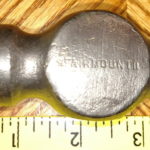
Fairmont 16 oz. Ball Pein 4″ 1-1/8″ 15.9 oz. 451 g.
Ball Pein Blank 12 oz. (no eye) 3-3/8″ 1-1/8″ 11.9 oz. 337 g.
Unmarked 8 oz. Ball Pein 3-3/8″ 1″ 8.7 oz. 248 g.
“Forged” 5 oz. Ball Pein 2-3/4″ 7/8″ 5.3 oz. 152 g.
Stanley Ball Pein 3-3/4″ 1-1/4″ ? oz. ? g.
Unmarked Ball Pein 3-1/4″ 1″ ? oz. ? g.


Also See:

Mar 032018
 

Hicksville planing mill has everything. From pallets of purpleheart to Zebrawood, but where they really shine is their ability to process the wood your buying right there while you wait.

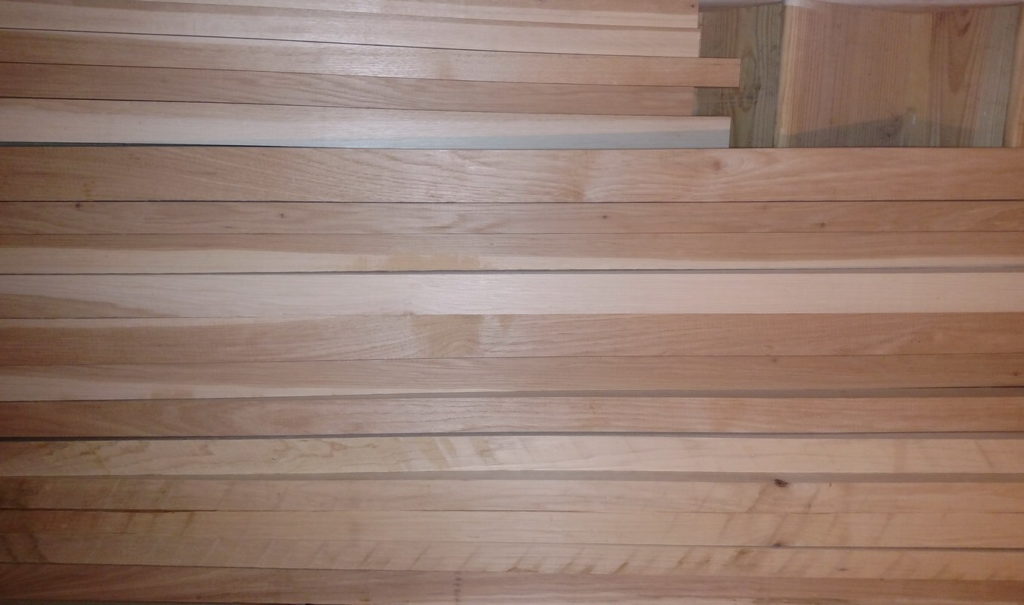
I’ve been re-handling old hammers and it’s costing [in many cases] more than the tool for the new handle. Plus, anything you can make yourself makes the tool just a little more fitted, and personal. So I started looking into making my own. Since none of the lumber yards around here have hickory or ash, I bought a couple of shovel handles, cutting and shaping them to size. This is a nifty trick if you need small handles, but it leaves little room to customize the handle beyond a tiny palm swell.
On Friday Jess and I loaded into the old Tahoe and drove up to Clear Spring, MD and dropped by my favorite Mennonite lumber yard. As one would expect they had plenty of Hickory, Ash, and Cherry the three kinds of wood I was considering for handles. Since Hickory is “king” when it comes to handles it was my first stop and we ended up finding more then I could possibly use.

Heartwood vs. Sapwood

I’ve been reading about using heartwood vs. sapwood for handles and after reading many opinions I’ve settled that it doesn’t make any difference whatsoever. Having a choice between straight heartwood, straight sapwood and a mix of the two (which I think looks amazing) I settled on the boards that had a good blend of each.

Since I’m sure someone wants to know the cost of Hickory at Hicksville planing mill was:

  • 5/4, $3.10 per board foot.
  • 6/4, $4.00 per board foot.

A survey of handles on hand.

I measured all of the handles I had around to see what dimension of blanks I would need. Most hammers were straight with the thickest point being at the swell (rarely more than 1.5″) and the widest point being in the grip or cheek (usually 1″ up to 1.25″). Half hatchet, heavy hammers and other beefy hammer handles made it to 1.75″. Hatchets, boys axes would measure up to 2″ shoulder and across the heel and toe. I measured across the belly and throat on a couple of curved 36″ ax handles and they fit within a 2.5″ blank.

With all these numbers I put together a quick handle blank sizing table that will work for me. That’s another post though so I’ll link to it here.

Getting all of the wood ripped, planed and cut to blank stock.

Again I love this mill because not only can you find exotics and hard to find hardwoods but they will process the wood right there for you while you wait. They even let you help, which I appreciate in this day and age of liability fear. I picked my two favorite boards from the 5/4 and 6/4 pallets. Most of the boards were 8 to 10 feet long by around 7″-12″ wide. Way more wood then I need, but it’s a long trip and I wanted enough material to experiment with. Being able to make mistakes is a good way to learn so I’d rather have more than not enough.

We ripped them to the following sizes:

Dimensions Use Feet Available
1 x 1 Very small (3oz ball peen, small tinners\setting hammers) 0′
1 x 1.25 Small striking tool handle (ball peen, etc) 0′
1 x 1.5 Hammer, Trade hatchets, ball peen, etc 0′
1.25 x 1.25 Medium striking tool handle (ball peen) 0′
1.25 x 1.5 Heavy Hammer, Roofing hatchet, medium cross peen 27′
1.25 x 1.75 Half hatchet, Extra Heavy hammer 22.5′
1.5 x 1.5 Drilling hammer, Hammer with large palm swell 9′
1.5 x 1.75 Half hatchet with a curve, Straight \ Miners ax 36′
1.5 x 2 Boys ax, House ax, Straight \ Miners ax 3′ ??
1.5 x 2.5 Curved handled, full-sized axe 10′


A note on the sizes.

After some experimentation 4/4 would have been a better choice for many of the small hammers. I’m grinding away so much wood to get them down to size.

I’ll make another trip and pick up some 4/4 hickory and perhaps some ash also to experiment with. Just not nearly as much!


Additional Links and Info:

Our first trip can be found here: Visit to Hicksville Planing Mill

Mar 022018
 

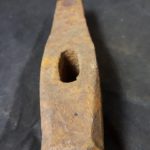
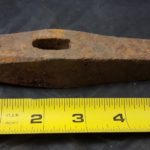
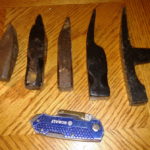
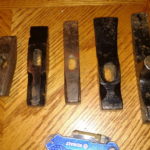
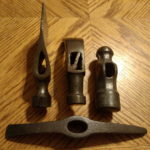
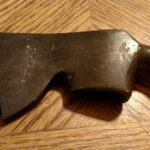
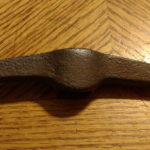
Lately, I’ve had an opportunity to pick up some misc rusty hammers and hatchets that will be refurbished and put back into use. I’m going to add them to this post as they arrive so I can keep track of what needs to be done. And perhaps more importantly whats been completed 🙂

Lot #1 – Tiny old Rusty Hammers (February 27th, 2018)

Some of the smallest hammers I have ever owned are in this lot I just received from an eBay seller.

I really like the tiny 3oz ball peen and look forward to hanging her on an itty-bitty handle! I’m also excited to add another setting hammer to my collection and filling in another hole in the ball peen hammers rack.

Style (best guess) Length Width Shape Lb./Oz. Grams
Small Claw Hammer 4″ 3/4″ Round 8 oz. 228 g.
Tack\Carpet Hammer 4-3/4″ 5/8″ Round 3.5 oz. 96 g.
Tiny Ball Pein 3″ 5/8″ Round 3 oz. 85 g.
Small Ball Pein 3-1/2″ 1-1/8″ Round 11.3 oz. 321 g.
Tinners Setting Hammer 4-1/8″ 3/4″ Square 7.7 oz. 225 g.


Lot #2 – Assorted Trade Hatchets (March 3rd, 2018)

A nice gent on facebook listed a couple of interesting hatchets. I jumped on the plump roofers’ hatchet which I have wanted for a while. He also had a nice-looking Vaughan, and a beat to heck produce hatchet.

I’ve had a chunky produce hatchet on my want list for a while. And even though this one is in rough shape, I thought it would be a fun project to mod. I’m still playing around with the shape, but I think I’ve made it into something usable.

Style (best guess) Length Width Shape Lb./Oz. Grams
Plumb Roofing Hatchet 7″ 1-3/8″ xx 1# 2.3 oz. 520 g.
Vaughan SuperSteel Roofers Hatchet 6-1/2″ 1-3/8″ xx 1# 1.6 oz. 500 g.
Produce or Barrel Hatchet 6″ 1-1/8″ xx 1# 5.4 oz. 600 g.


Lot #3 – Assorted Ball Pein Hammers, 6-pcs (March 4th, 2018)

This next set is a group of ball pein hammers. They are mostly small but fill in a few holes in my set.

Make \ Type Length Width Lb./Oz. Grams
USHCO 8oz Ball Pein 3-1/4″ 1″ 8.6 oz. 245 g.
Stanley 8oz Ball Pein 3-1/4″ 1″ 8.6 oz. 244 g.
Stanley 12oz Ball Pein x” x” x oz. x g.
Plumb 12oz Ball Pein (fiberglass handle) x” x” x oz. x g.
xxxxx x” x” x oz. x g.


Lot #4 – Amazing 1.6# Rusty Swedge (March 20th, 2018)

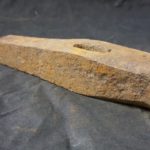
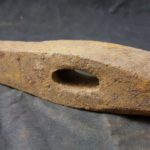
Got myself another birthday present. This swedge was supposedly a ship-markers swedge used to make rivet holes.


More cool hammers can be found here: Interesting Old Hammers To Restore

Jan 272018
 

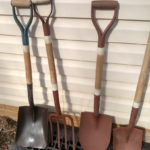
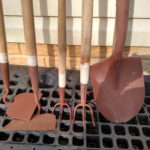
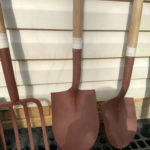
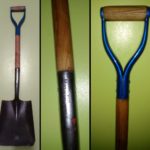
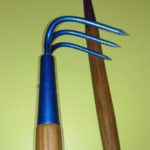
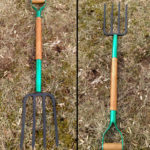
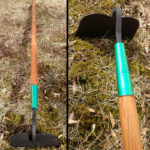
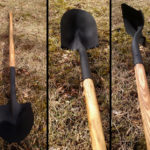
A while back I picked up some rusty, old garden tools from my friend Harry’s House. If you’re interested you can find more information here.

Paint day

Jess was away for the week and the weather was nice so it seemed like a perfect time to get some painting done. A couple of weeks before I removed the rust using naval jelly and gave them a couple of coats of prime (Rust-oleum Rusty Metal Primer). On painting day they were sanded almost to bare metal and prepared for paint.

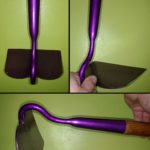
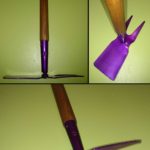
The handles on two of the shovels were painted metal flake blue–which I really liked. I had a couple old cans of Dupli-Color MetalCast paint, one was blue so I thought that would be a perfect fit. The MetalCast spray paint requires a base layer (metal flake ground coat), which I had a can on hand. Unfortunately, that was only enough to do some of the tools and one shovel had to be put away for another day.

I hadn’t used this paint for a while and I forgot how frustrating it is. It spatters, clogs and is just generally frustrating, that being said its amazing if you take your time. The spray paint, now 10+ years old was particularly frustrating. The blue can was only about 1/3rd full, and was depleted very quickly, but I had a partial can of purple and green which I finished up the project with.

Before Paint:


After Paint (Day 1):


Update: After Paint (Day 2):

Update: 2/15/18 – More tools completed and ready to use.

After a couple of cold rainy weeks the sun came out for a day and I quickly gathered some more tools that were ready for paint. Most of these got primed over a month ago and got all non-working areas coated with metallic paint a few weeks ago in the paint project above. Today was just finishing the working surfaces with a coat of flat black paint. I really think the floral spade came out especially nice!

Jan 272018
 

My dad always had every possible tool on hand. These days I’m always trying to force the wrong tool to do the job. While I can’t afford to buy quality new tools, in this throw away world you can often find great vintage tools on eBay for just a couple of bucks.

I’ve been keeping my eyes open for old tools on eBay and when I find interesting stuff for only a couple of bucks I bid, and occasionally win a lot or two. Since I’m trying to keep my costs below $10 shipped I usually watch for lots, which offer the best pricing.

Here are two lots I won recently. Among them are a few items I’m really excited about.

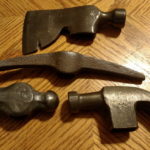
Lot #1 contains a couple of really nifty small hammers made from great steel.

Lot #2 contains a mini miners pick and a craftsman half hatchet.

Also included is a picture of some handles I picked up in town.

Lot #1: Assorted Unusual Small Hammers

Style (best guess) Length Width Shape Lb./Oz. Grams
Brick Hammer 6 3/4″ 7/8″ Square 1# 457g
New York Style Masonry Hammer 5 3/4″ 1 1/8″ Square 1#/5oz 600g
Tinners Setting Hammer 5″ 7/8″ Square 14.5oz 400g
Cross Peen Forming Hammer 5″ 7/8″ Circular 1#/1oz 490g
Riveting Hammer 4″ 3/4″ Square 10.5oz 300g


Lot #2: Half Hatchet, Mini Mining Pick, Claw Hammer and Ball Pein Hammer

Style (best guess) Length Width Shape Lb./Oz. Grams
Craftsman Half Hatchet – Finished 6″ 1″ Round 15oz. 422g
Ball Peen 4″ 1-1/4″ Round 1#/2.7oz 533g
Curved Claw Hammer 5″ 1″ Round 15.5oz. 436g
Small Prospecting Pick
(maybe a Lining Hammer)
8″ 1″ Pick 10oz. 283g


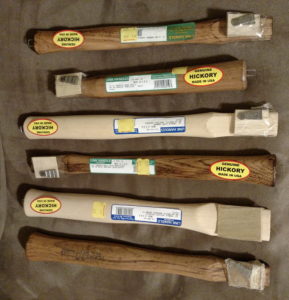
Handles Ready for Heads Above (Mostly from Nichols Hardware in Purcellville, VA)

Assorted Hammer Handles


Some additional cool hammers can be found here Small Rusty Hammers (part two?)

Jan 262018
 
Michigan Pattern House Axe

The Slammer: 3-1/4 lb. Michigan Pattern House Axe

So here is a fun little toy.

I got an unmarked Michigan pattern head a while back and I have been using it to experiment with different files and methods. It is good steel and probably has some years, but without a makers mark there is really no way to know much more about this head.

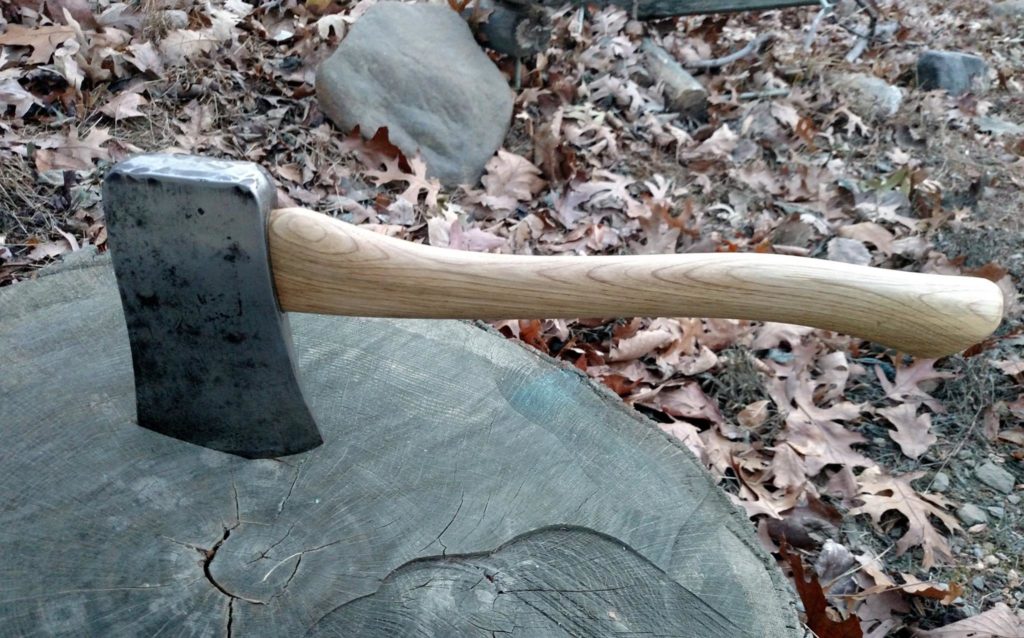
I ordered a hatchet handle on Amazon that turned out to be a house axe handle (full-sized eye on a 19-inch curved handle). A house axe is usually 1-1/2 to 2lbs much bigger than that and you end up with something that’s a little hard to control with one hand, but I just wanted to try something so I gave it a whirl and she came out pretty good.

A hatchet that can easily split 12-inch oak rounds with a single swing is something to see.

A fellow axe junky called it “the sawed-off shotgun of the axe world” and I think that’s quite fitting.

Facebook Post (private group): https://www.facebook.com/groups/AxeJunkies/permalink/1635872123118015/


Update 2/7/18: Yesterday Jess took the Slammer out and chopped some 18-inch red oak rounds. She’s a beast (the hatchet and Jess, lol)